Deploying MySQL on Oracle Cloud Infrastructure – MySQL Database Service
With Oracle’s recent release of MySQL Heatwave, I’ve been looking more into MySQL. I’ve actually looked at it a few times over the years, but the addition of Heatwave and how it allows MySQL to be used as an analytical platform. This post is not going to focus on Heatwave, but how to get MySQL up and running using the Oracle Cloud Infrastructure (OCI).
To get started, you’ll need to login to OCI. (If you need a free tier license, you can sign up here).
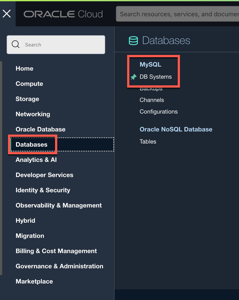
After creating and account and logging in, you’ll be on the dashboard. From the dashboard, open the “hamburger” menu and select Databases. Under the databases menu option is where you will find a category for MySQL. Under this category, select the DB Systems option.

When you arrive at the DB Systems page for MySQL, you will be greeted with a list of prerequisites needed. This is presented the first time to ensure that you set everything up correctly for MySQL Database Services. Create the needed policies to allow for MySQL access.

After creating the required VCN, Groups/Users, and Policies, click on the the “Create DB System”.

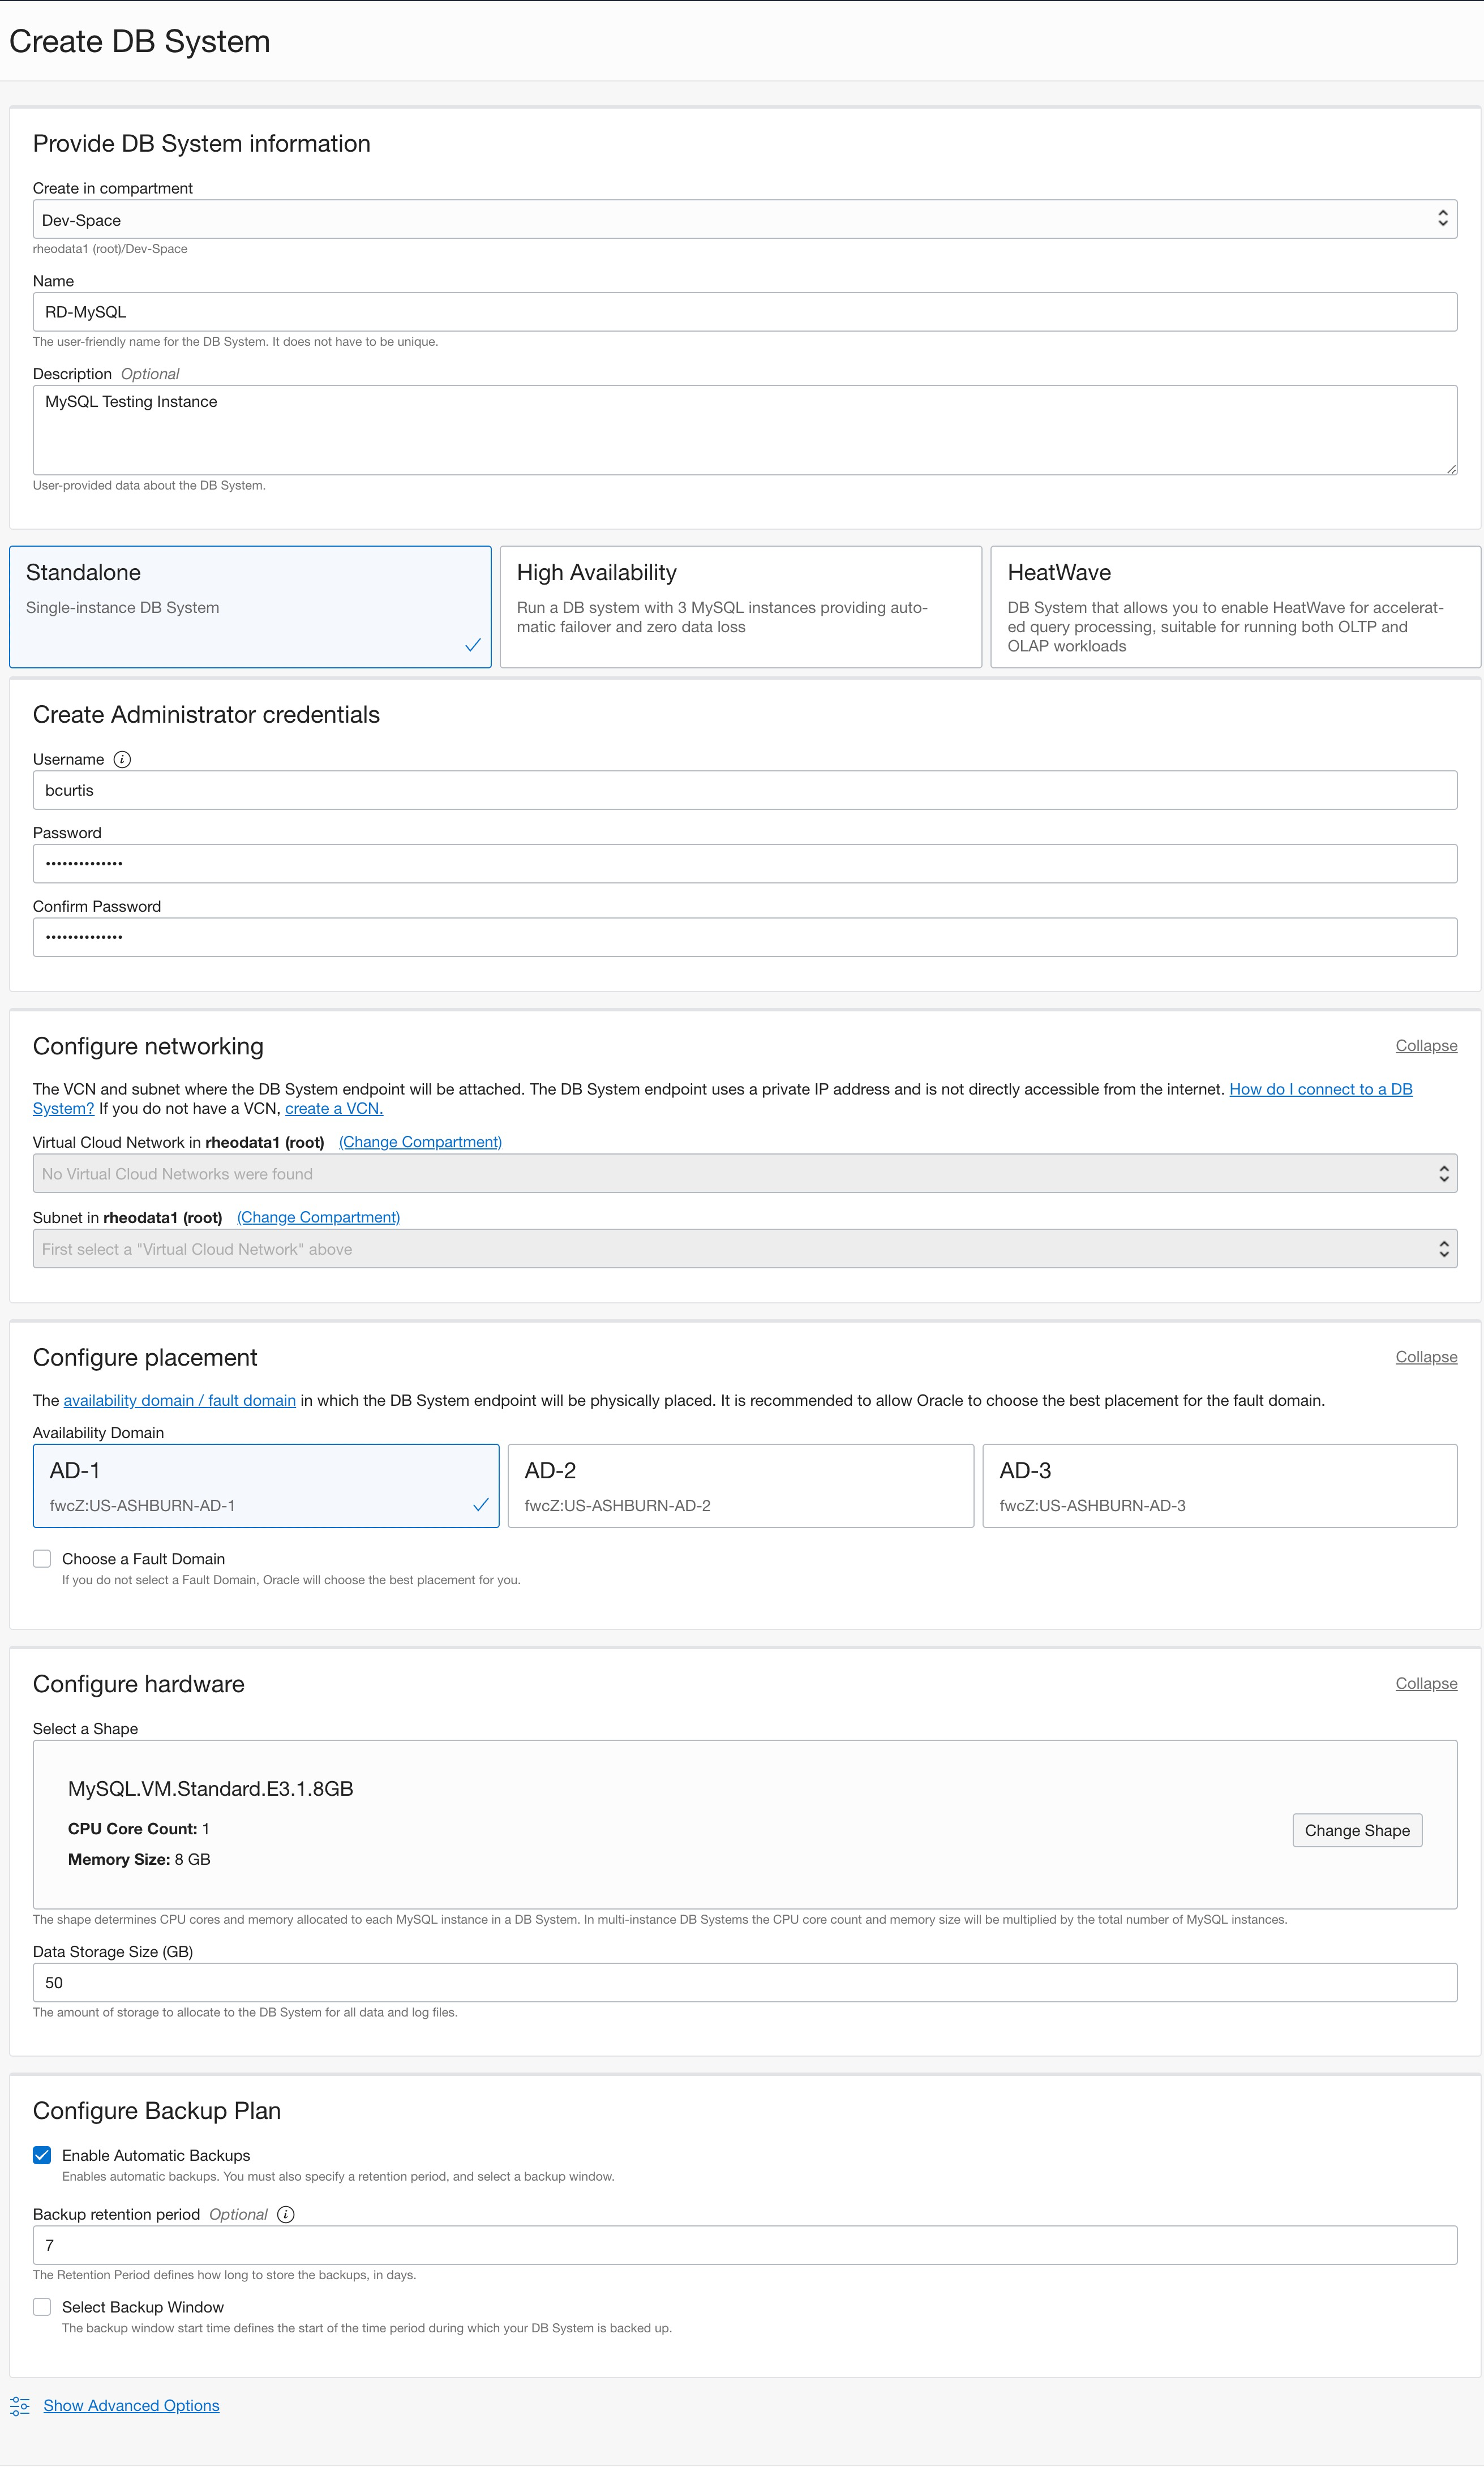
When the Create DB System page opens, you will need to provided the details for the MySQL configuration. This consists of:
- Compartment where it will be stored
- Name of the database
- Description (optional)
- Type of database to build – Standalone (default)
- Provide Administrator credentials
- Provide VCN details
- Provide availability domain
- Configure the shape that the MySQL database will be used
- Enable automatic backups

Once all these items have be defined or provided, the Create button can be selected.
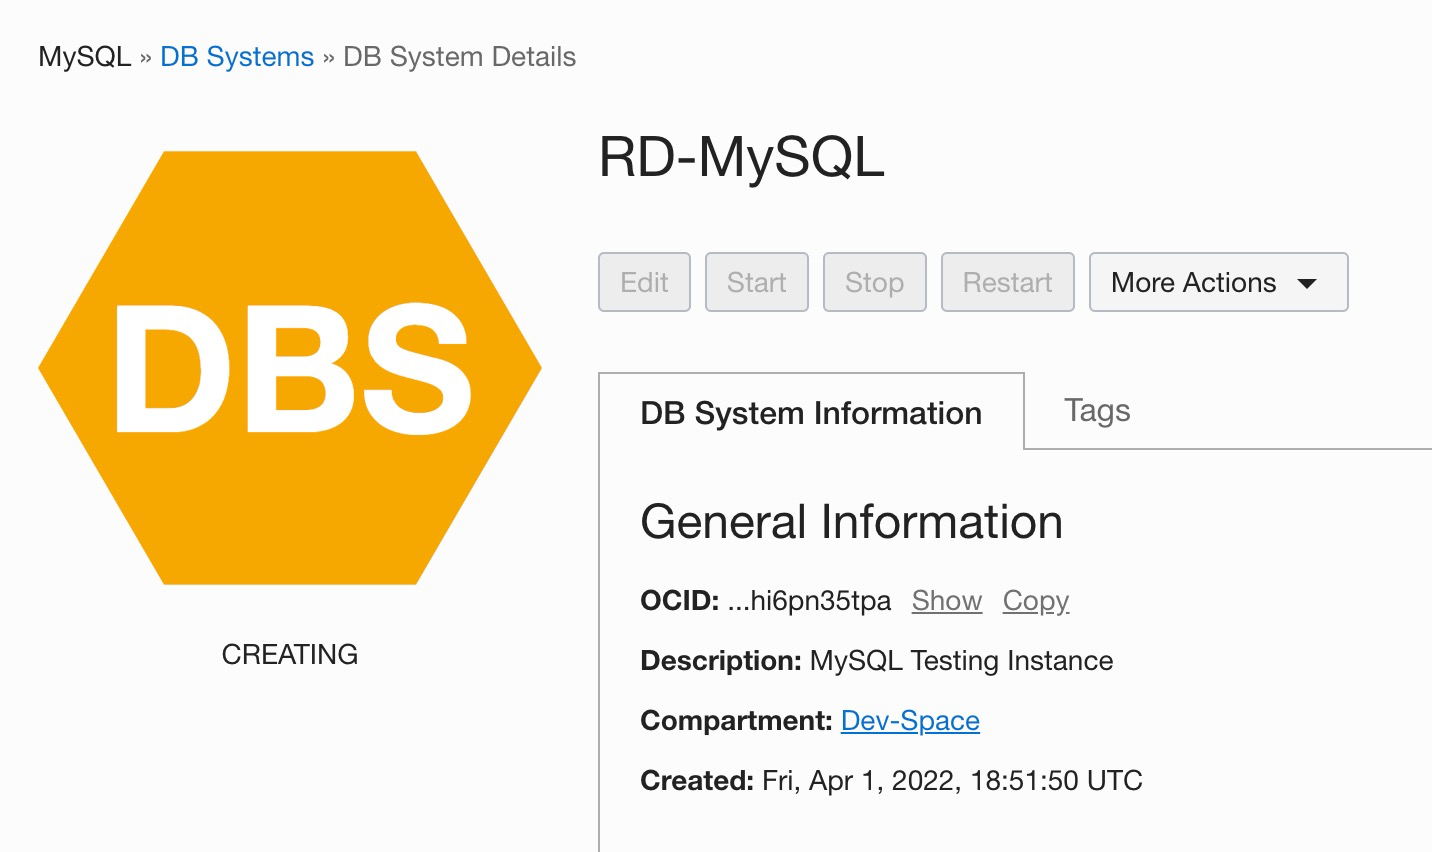
After hitting the Create button, OCI will start building the requested MySQL database.

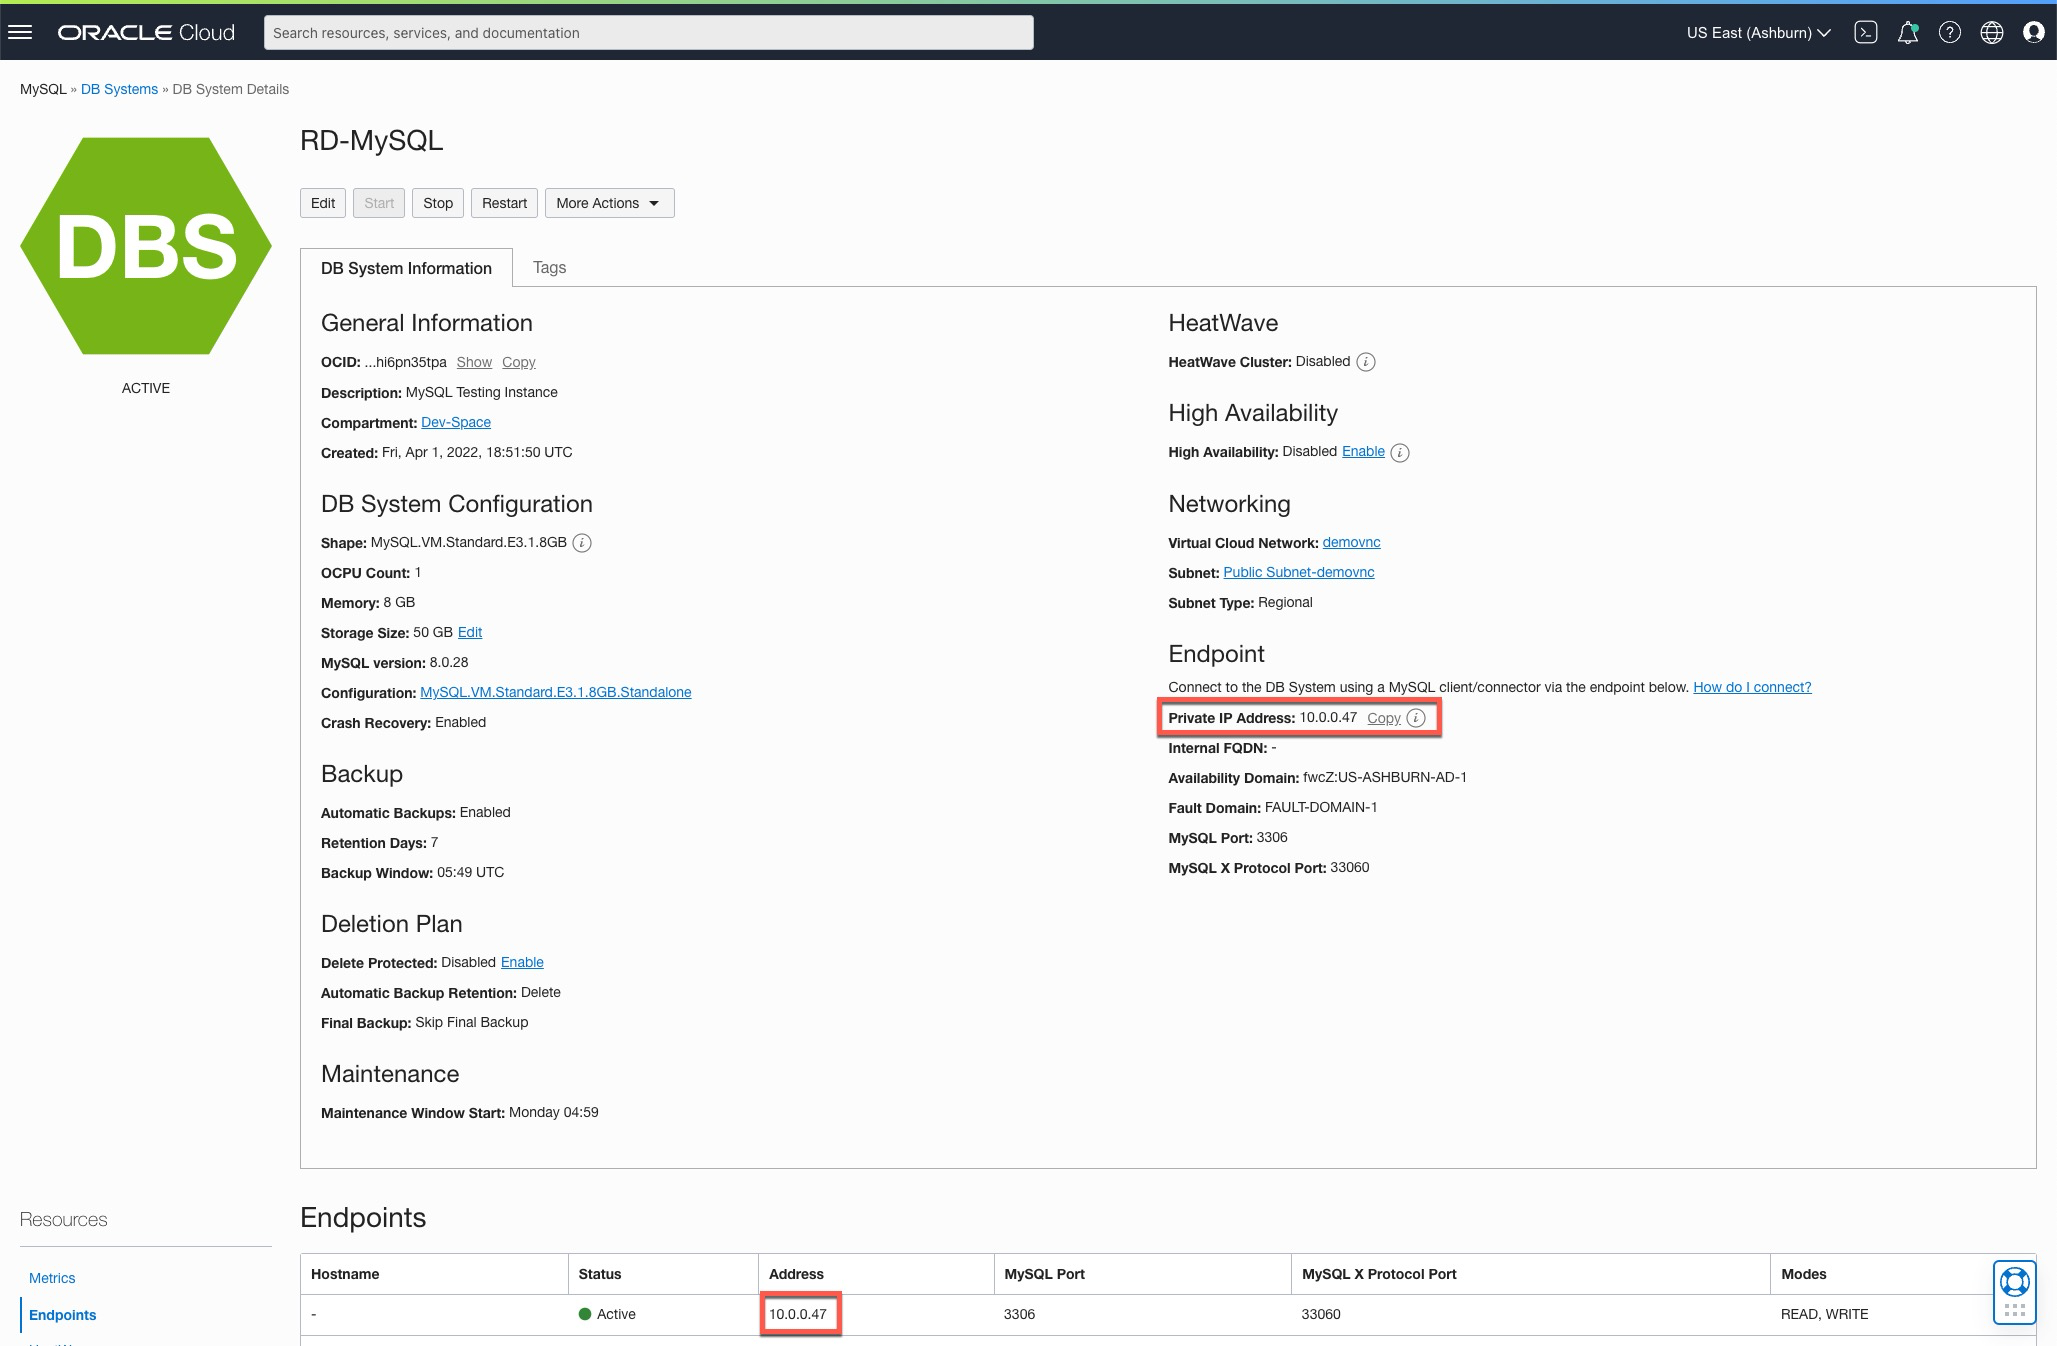
A few minutes later, I now have a MySQL Database System running.

At this point, you can click into the DB System that has been created and see the General Information. On thing to notice, this Database System is only assigning a Private IP address.

By placing the MySQL database on the private network, you’ll have to install a compute node that has public access and private access to the private endpoint. I’ll write a post soon on how to configure the compute node for MySQL access, but for now MySQL is up.
If you are interested in building the compute node, you can reference my post on how to build an OCI compute node via Code – here.
Enjoy!


