Access Oracle DBCS Pluggable Database via Bastion Connection

What is a Bastion?
There a three primary definition for the word Bastion. They are:
- A projecting part of a fortification
- A fortified area or position
- A place of security or survival
In all three of these definitions, a bastion is a secure place. Within cloud environments security is one of the biggest things to worry about, after all you don’t want to have your databases broadcasting on a public ip address. What is the answer then; well the answer is to keep all items on a private subnet/network and access these resources through a “bastion” host.
Below is a simple network architecture that illistrates how to access our testing PDB via a bastion connection. This is a secure way for accessing our database when needed while not broadcasting it publicly.
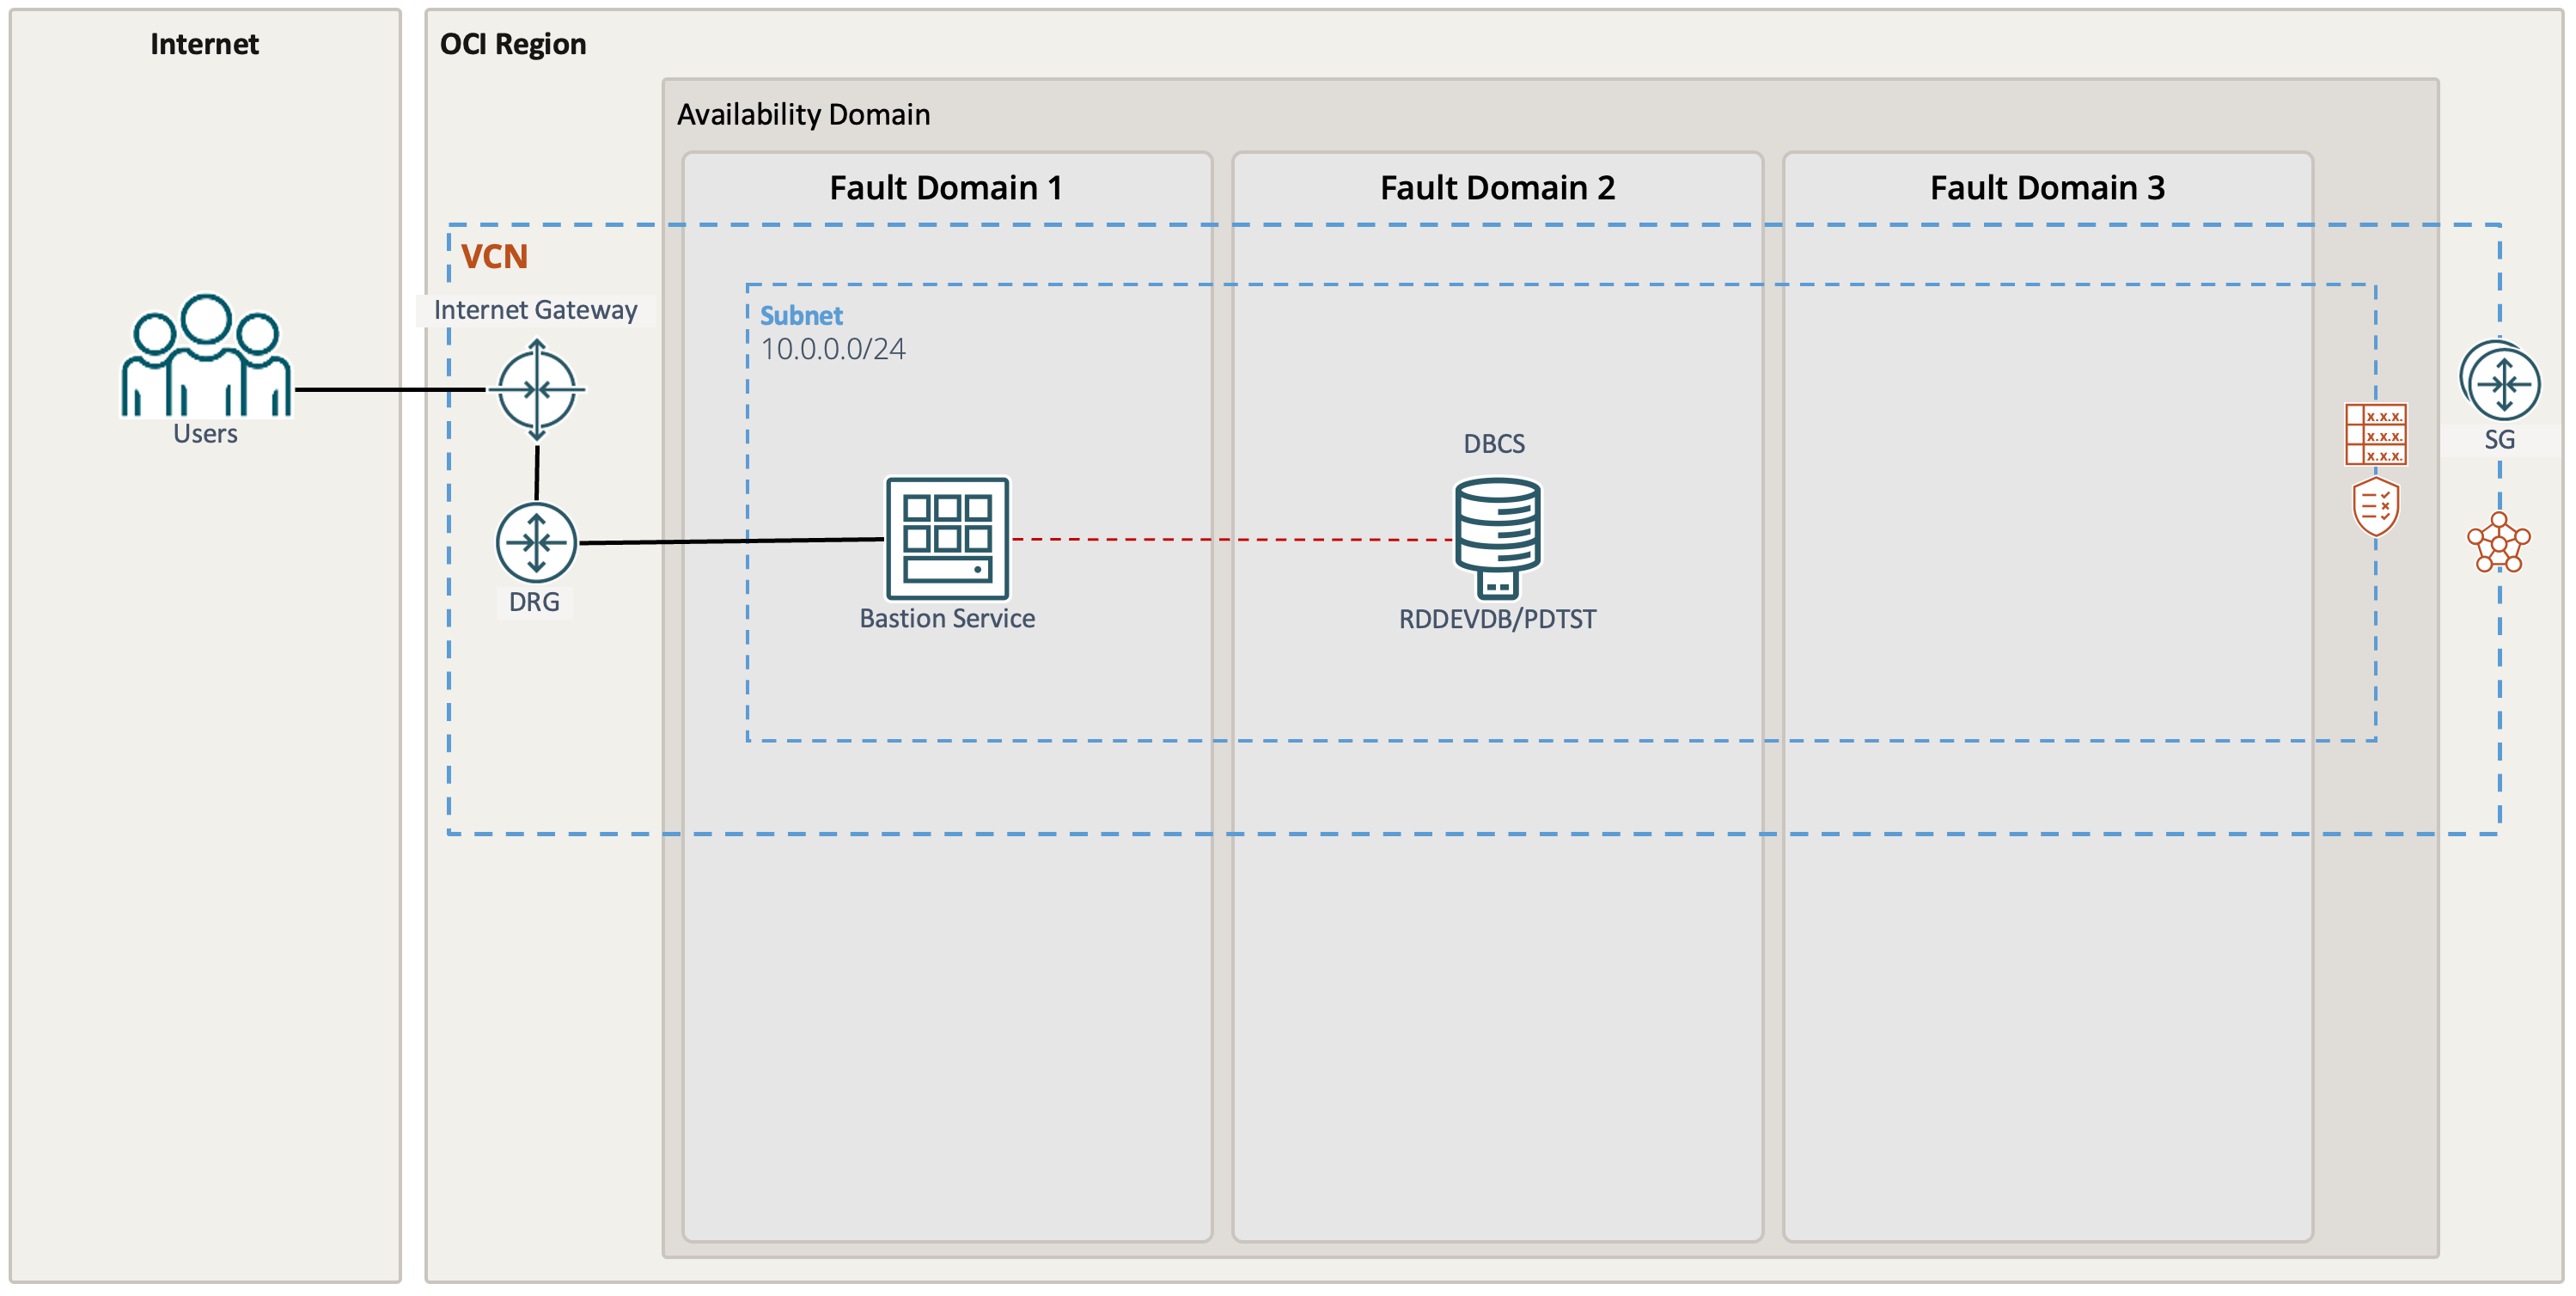
From the network architecture above, it looks pretty straight forward on how to connect to the PDB which is in the Fault Domain 2. In really, to make this connection, we need to create the Bastion host then enable the bastion to connect via ip address to the database.
Find the Database Host IP and other information
The first thing we need to do is find the database host ip address. This address will be a private IP address of where the database is running. This can easily be found by going to:
Overview -> Oracle Base Database -> DB Systems
Then select the database which you want to access. In our case, we are going to use RDDEVDB.

After clicking on the database that is going to be used, you’ll notice in the lower left-hand side there is a Resources section. To the right of this section is another link of the database name. Select the database name to view the Database Details.

After clicking on the database name, you will be on the Database Details page. This great if we wan to get the Container Database information; however, we want to dive a bit deeper to the Pluggable Database. On the left-hand side, you’ll see the Resources section. Under this Resources section, notice that there is a link for Pluggable Databases.
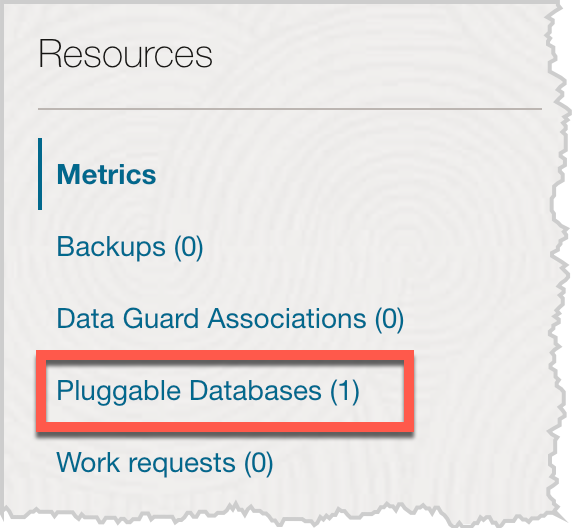
After clicking Pluggable Databases, the bottom of the Database Details page will change to show the Pluggable Database. Once this happens, you will see the name of the Pluggable Database that we want to connect to.

Clicking on the Pluggable Database link, will bring you to the Pluggable Database Details page. On this page, there is a series of buttons at the top of the page. These buttons allow you to review a variety of items for the Pluggable Database. Where you are most interested in is the button that says “PDB Connection”.
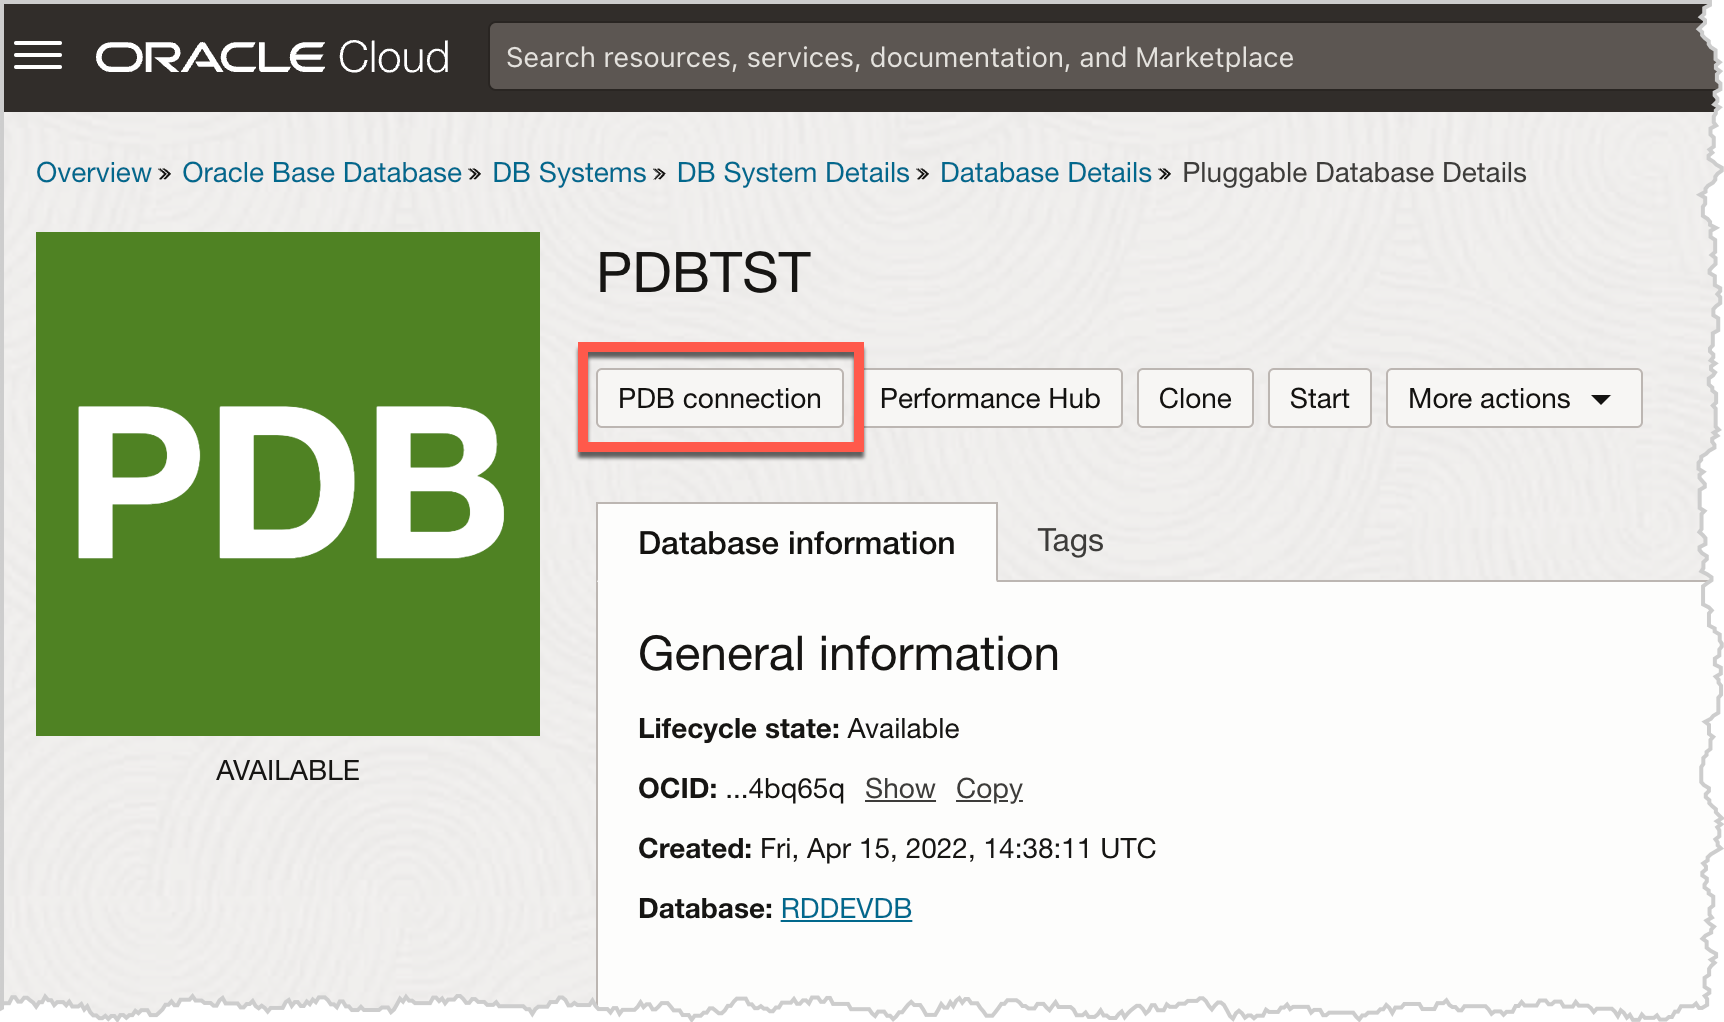
By clicking the “PDB Connection” button, opens the details we need to make a connection from the Bastion host. When reviewing the connection strings, it is best to use the “Long” version of the connection string. Within this connection string, you will want to use the “Host” information. The contents of the “Host” should be a private ip address on your VCN. In our case the IP address is 10.0.0.233 and listening on port 1521. Also make note of the service name for the PDB. This will be used later as well.

Now that we have the connection information we need to connect to the Pluggable Database, lets take a look at how to build the Bastion Host.
Building a Bastion Host
The Bastion host is considered a security feature of the OCI framework. When looking for the Bastion configuration pages, it will be found under Identity & Security of the OCI pages. After accessing the Bastions page, there will be a “Create Bastion” button.
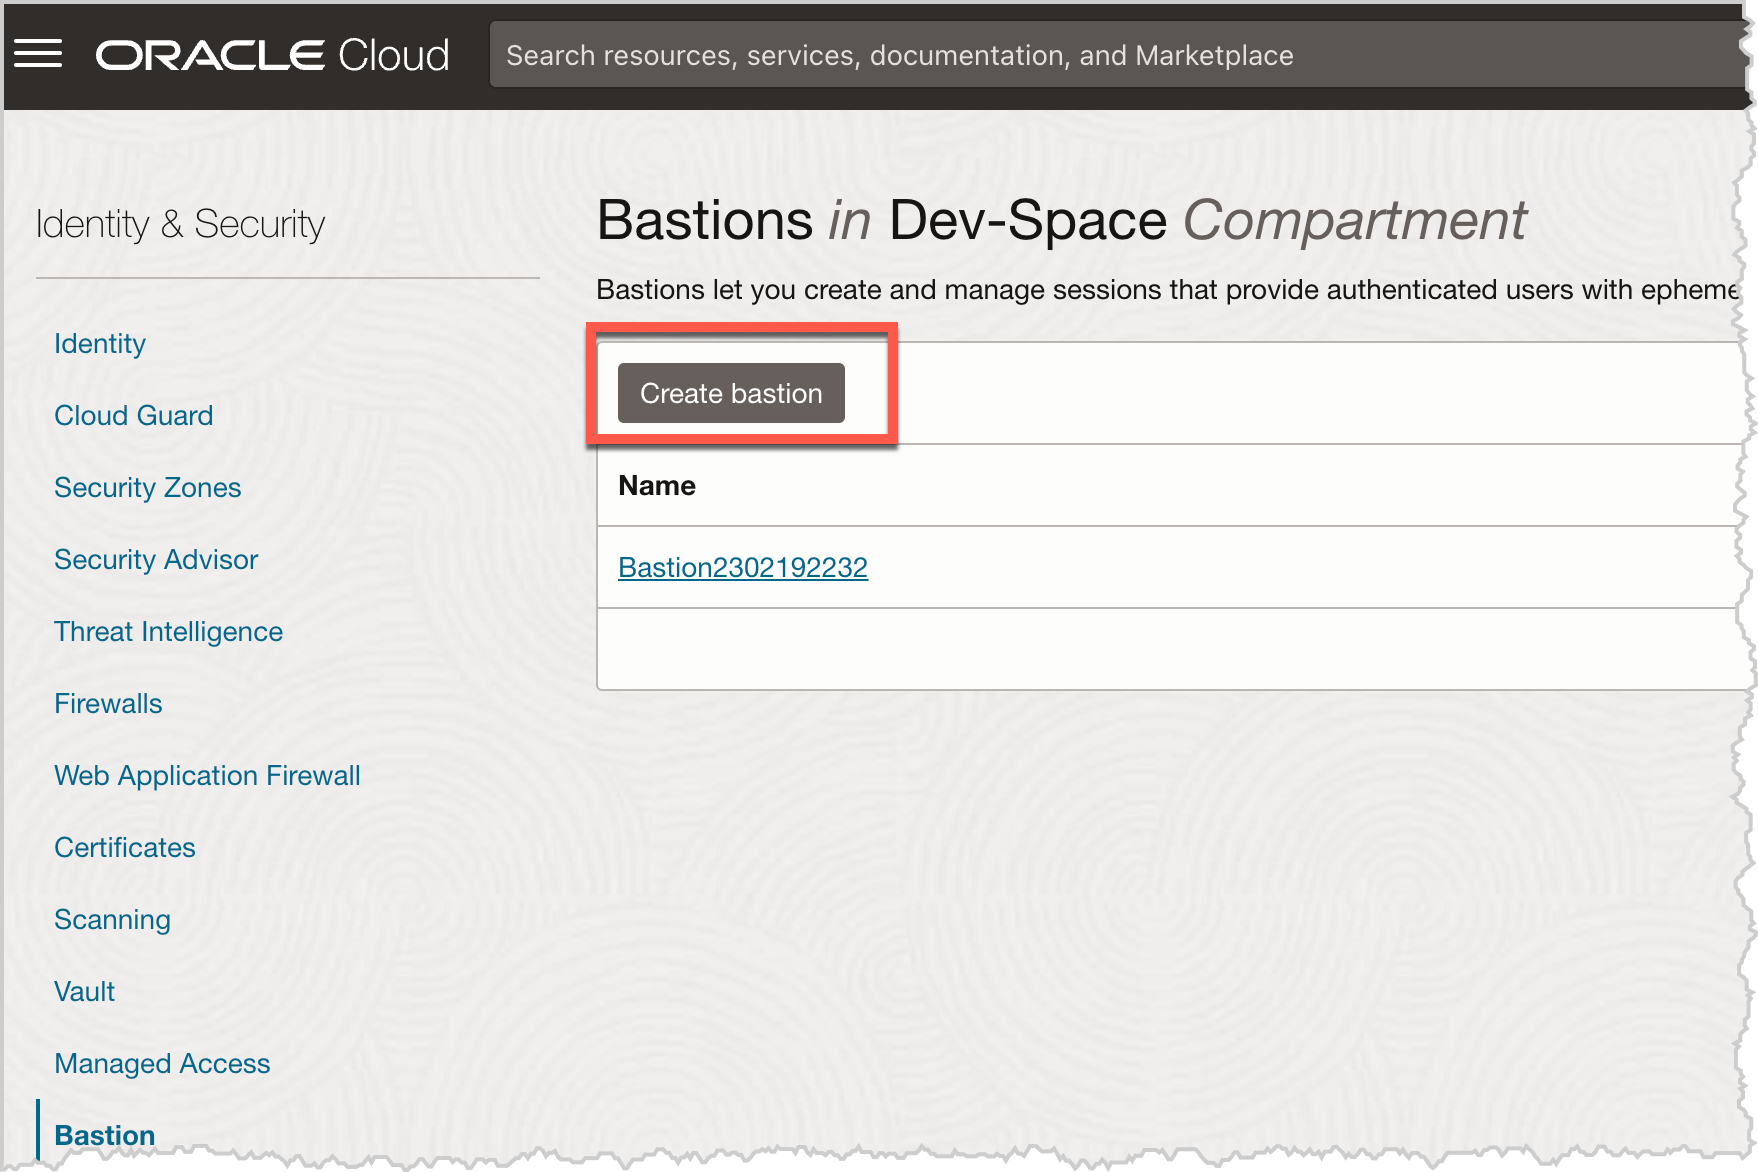
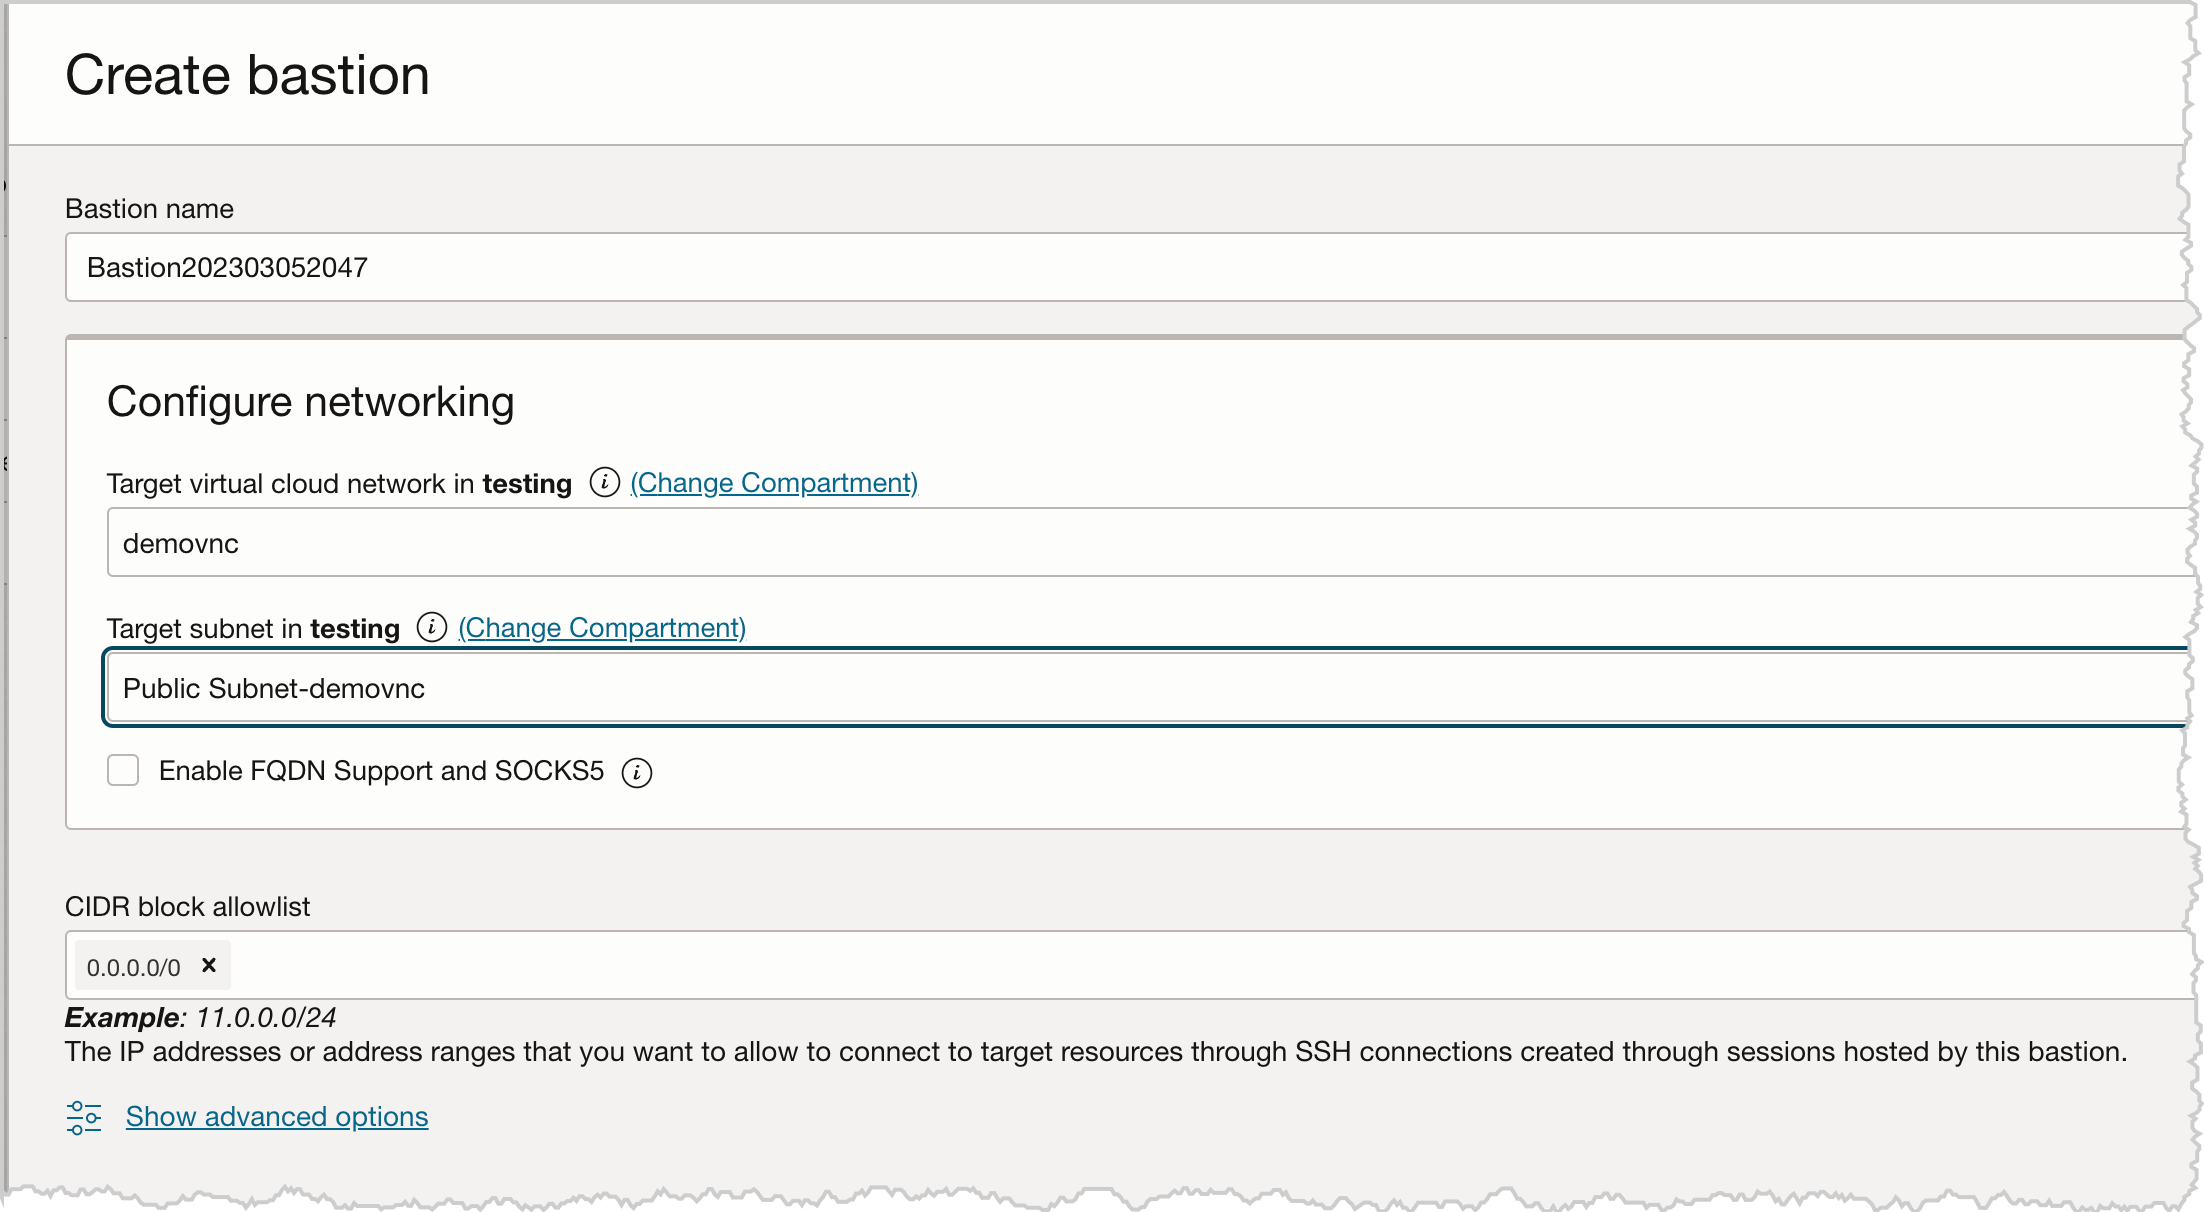
This will open the dialog where you can name the Bastion host, provide the VNC and subnet, and what CIDER block can access the Bastion. In this example, I’m allowing access from anywhere by using a cider of 0.0.0.0/0. After filling in all the required information, click the Create button at the bottom of the dialog. This will kick off the creation process.
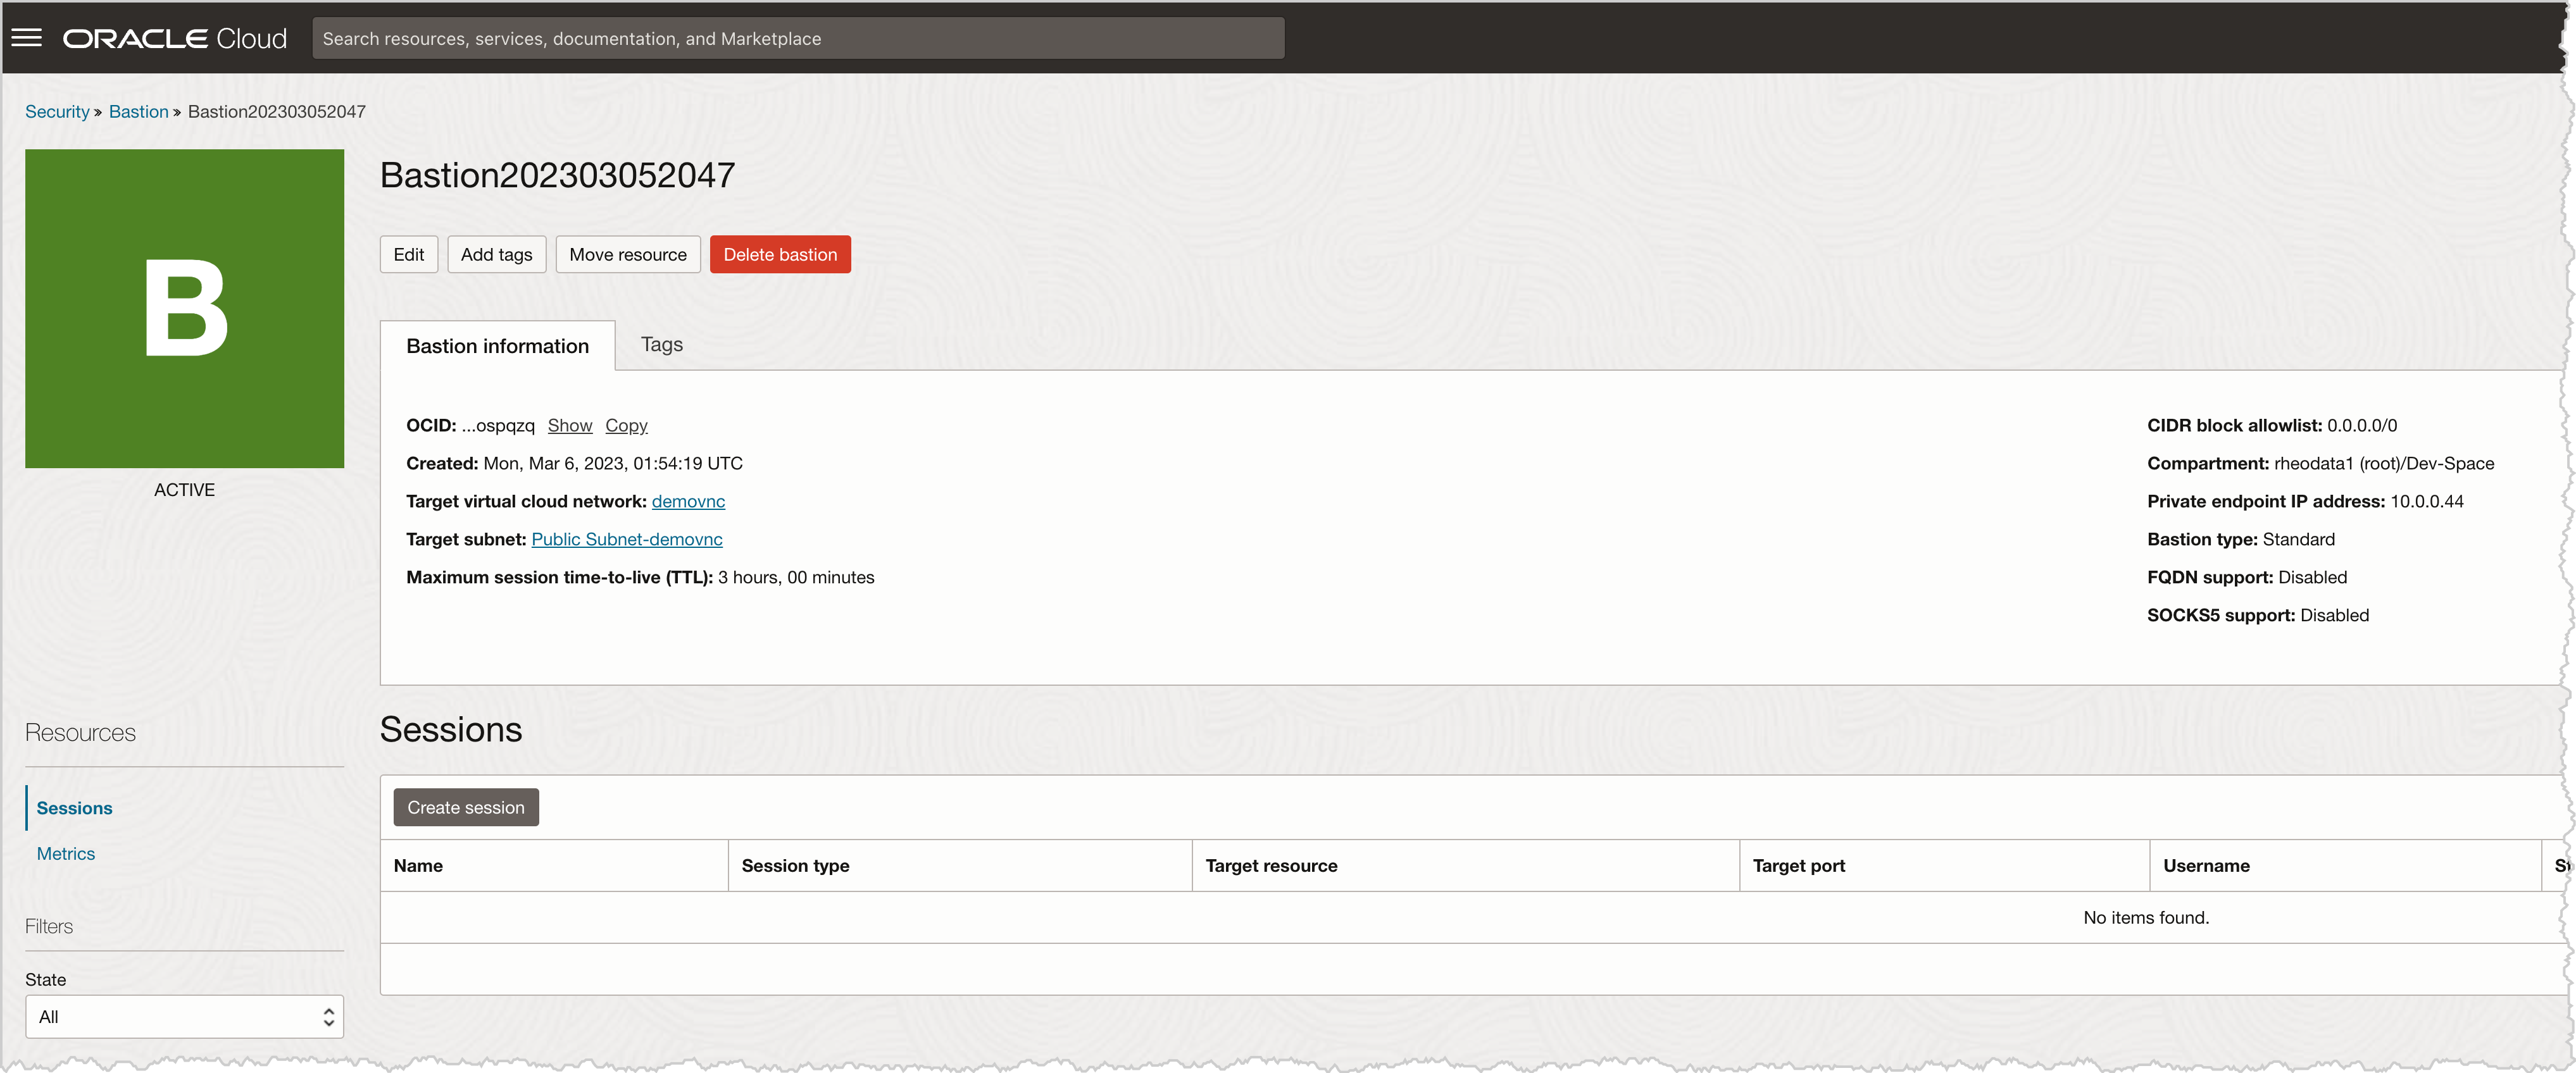
Once the Bastion host is create, the Bastions page in OCI will show that the bastion host is active.

With the Bastion host active, click on the name of the bastion to access the Details page. On the detail page, you can see the specific details of the host. On this page is a “Sessions” section where you can define the allowed sessions for connecting to the DBCS Pluggable database.
Defining a Bastion Session
When you are on the Bastion details page, a session can be created by clicking the “Create session” button. This action will bring up the dialog for creating a session. There are a few items that need to be either edited or selected on this page. Since we are going to connect to a DBCS instance, the session type should be “SSH port forwarding session”. Then provide a session name and select connect via IP address. Next provide the IP address which was identified earlier – which was 10.0.0.233. Change the port number from 22 to 1521. Lastly, select the RSA public key you want to use. In this case, I’m using a key that I previously created – id_rsa1.pub.
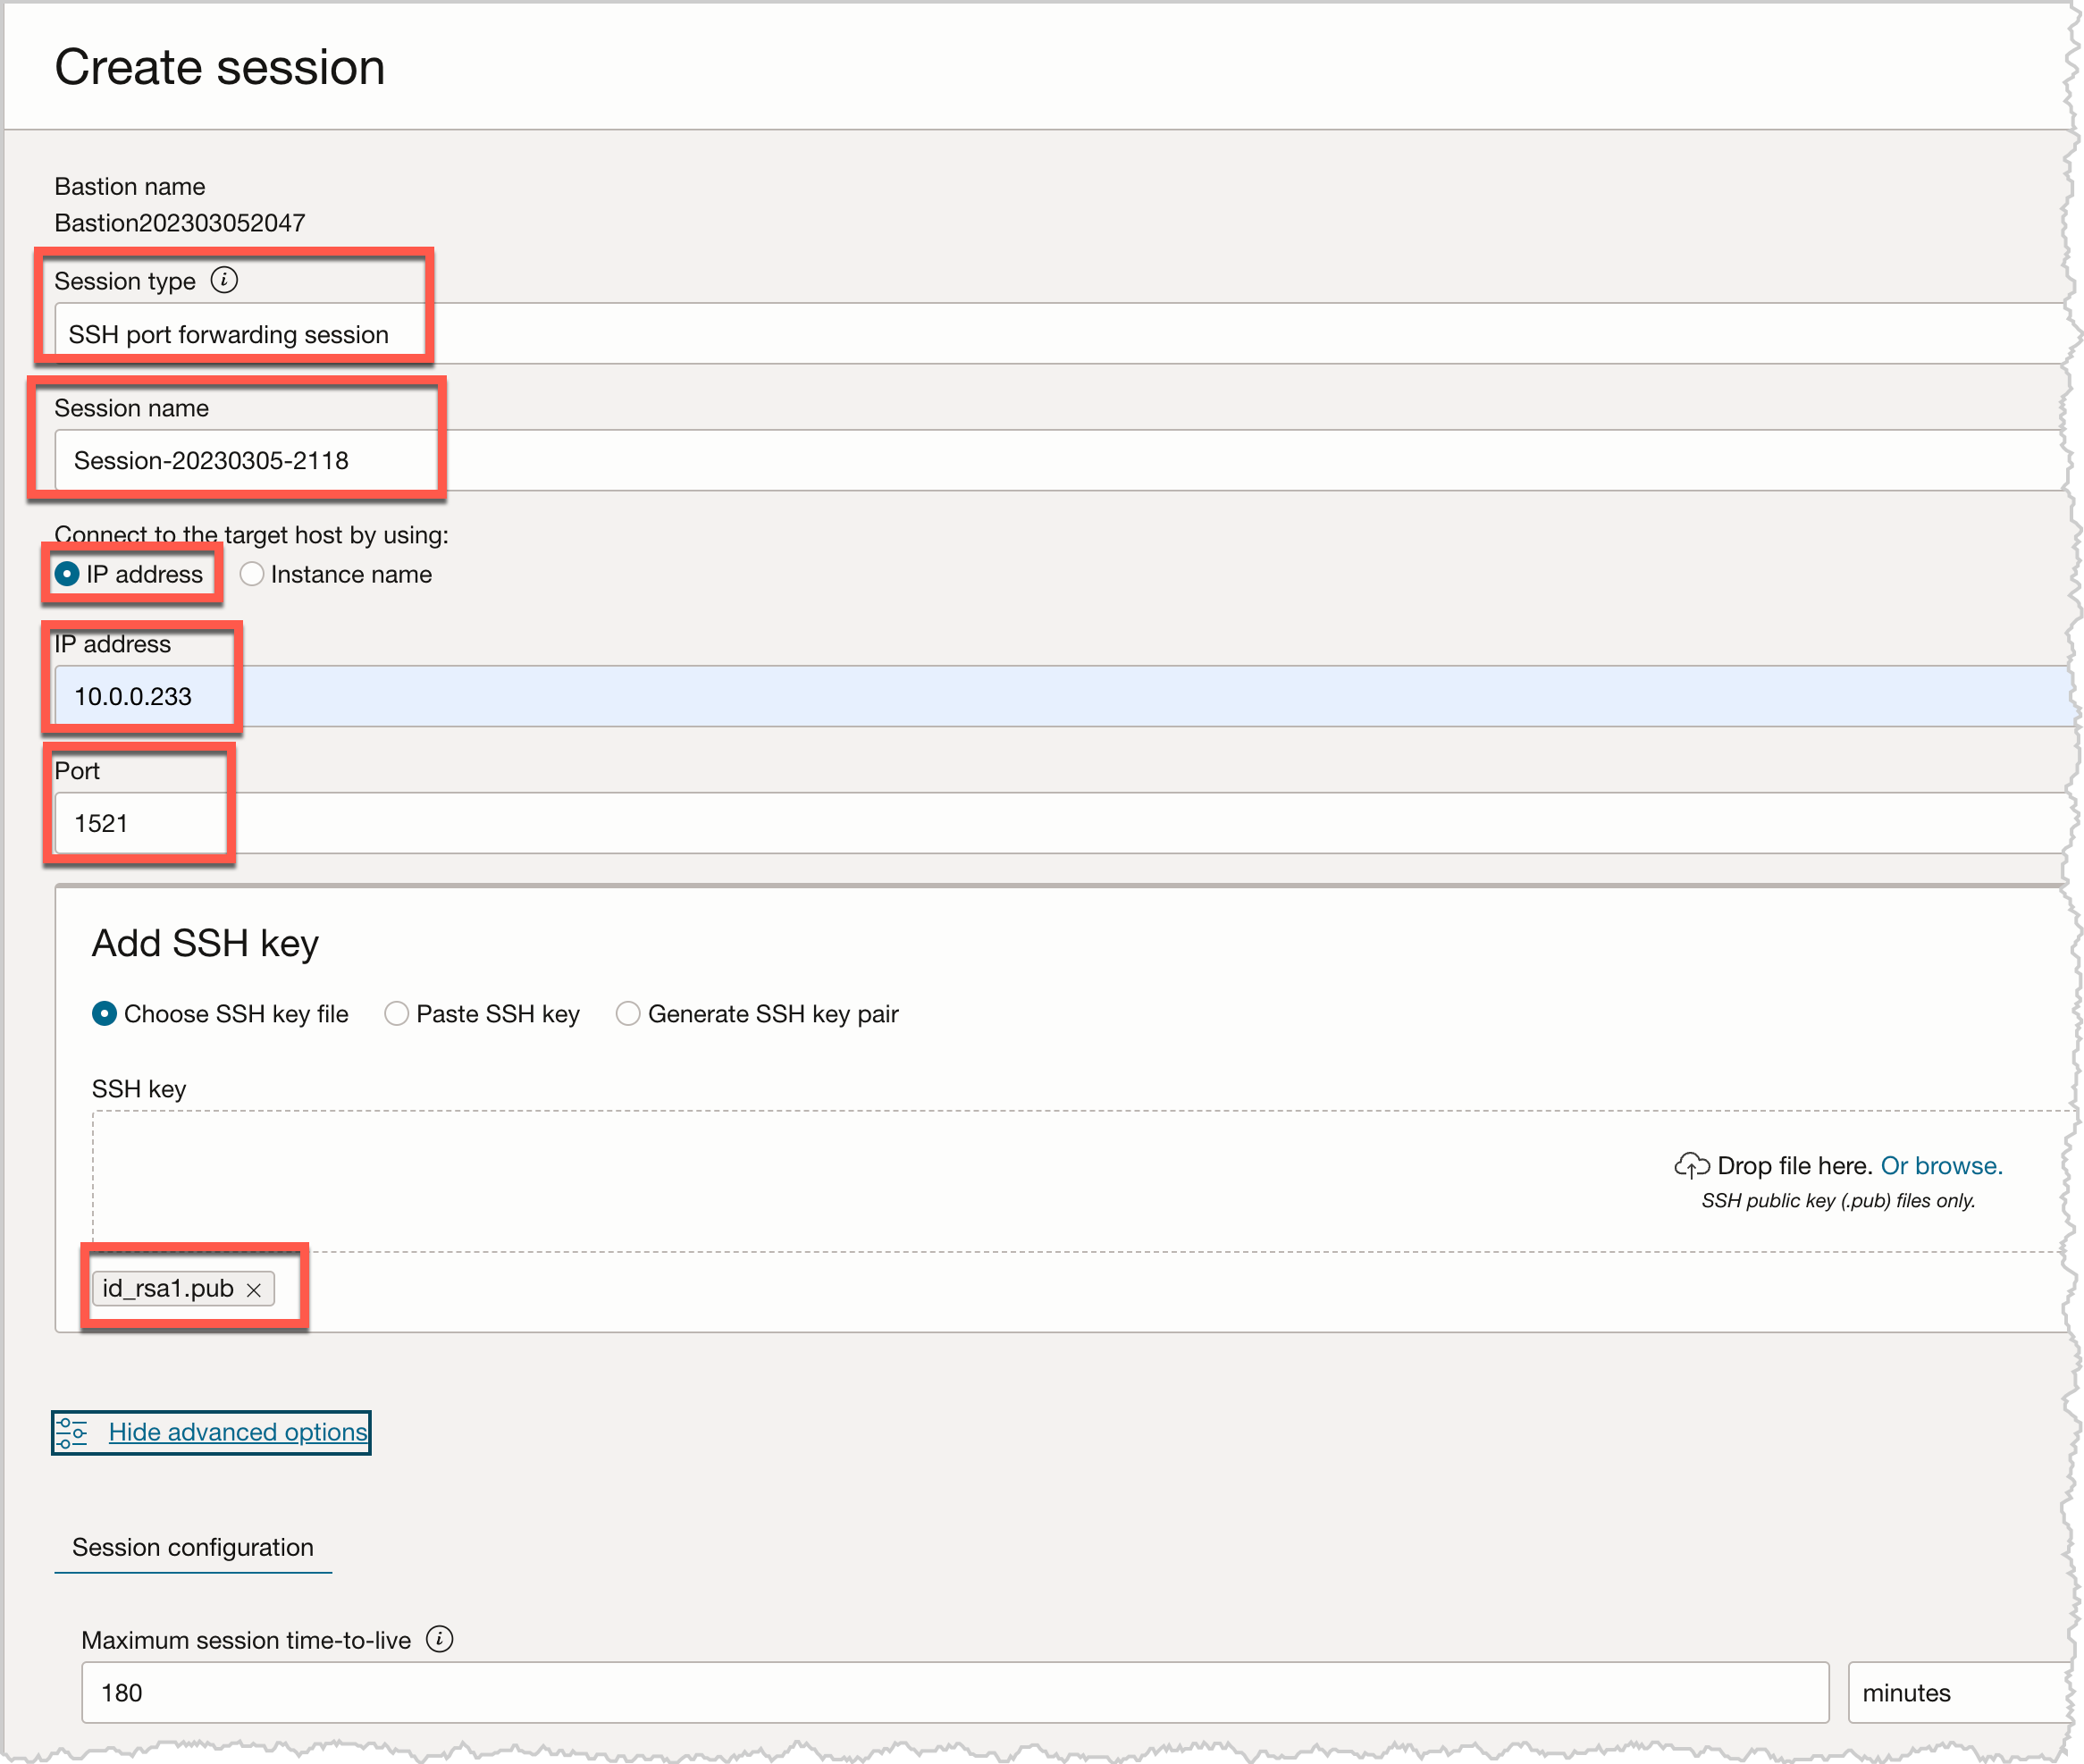
If you click the link at the bottom for “Show Advanced options”, you will get the maximum time-to-live settings. One-hundred and eighty (180) minutes is the max that can be set. If you try to add anything higher, the create session process will error out. After setting all this information, click the “Create session” at the bottom of the dialog.
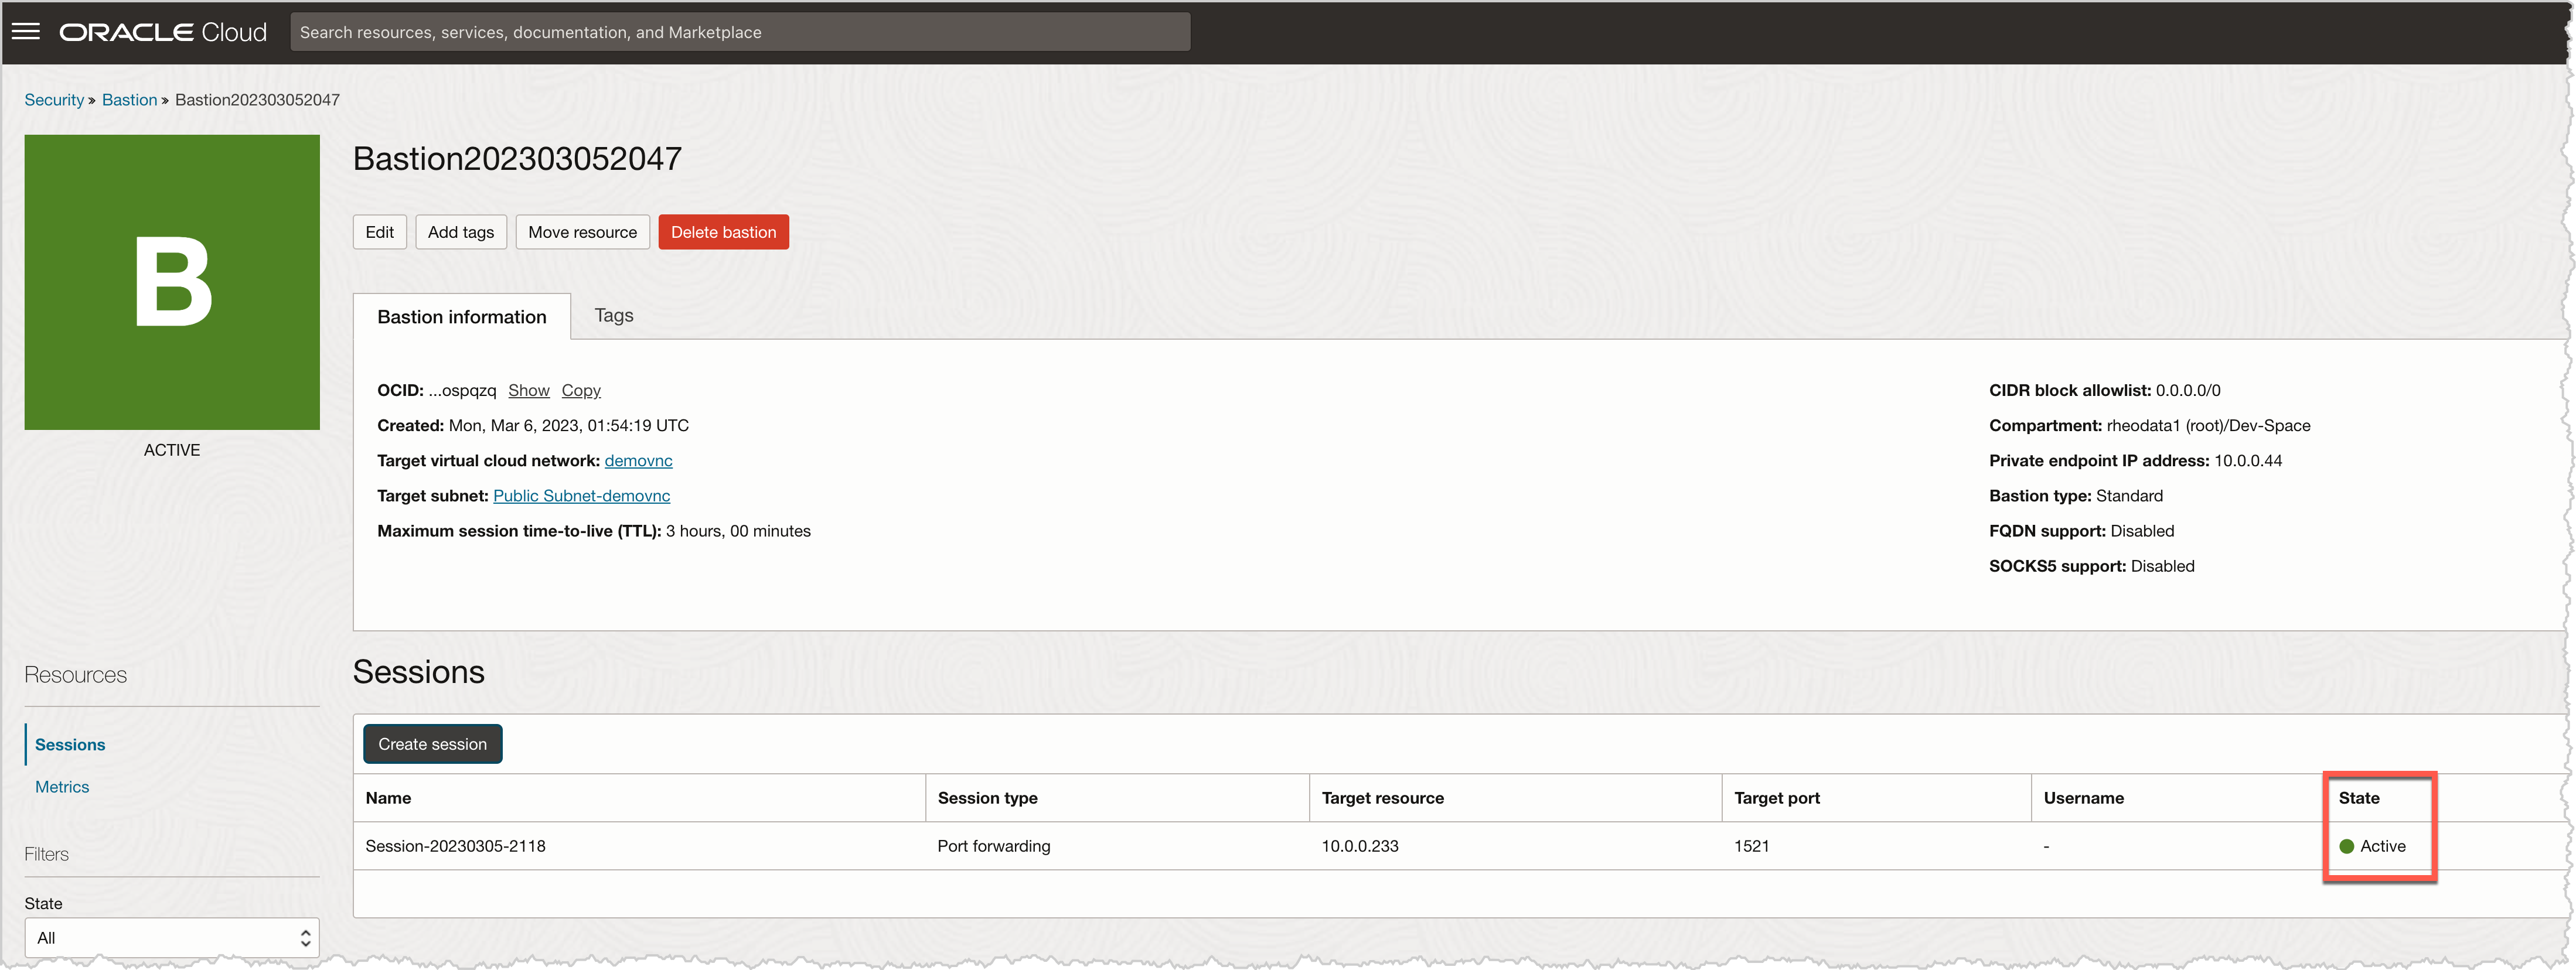
At his point, the Bastion detail page will be updated and it make take up to a minute for the session that was created to show active.
Database Connection through Bastion Host
Up to this point, this blog has been about identifying the needed information for the database that we need to connect to as well as setting up the Bastion host. With both of these items out of the way, now we can establish a connect to the database. In order to make a connection to the database, we have to first open the SSH tunnel needed.
Open an SSH tunnel
With the Bastion host created and the session for connecting to the a database on port 1521 running, we now have to open the tunnel. In order do this, we have to first find the SSH command to run. This can be viewed by selecting the three vertical dots at the end of the session table. There is an option for “Show SSH command”. When this is selected, a dialog will appear showing the command for establishing an SSH tunnel through the bastion host.

This command needs to be copied and then pasted into a command line terminal. The items enclosed in <> need to be updated. These items should point to the matching private RSA key and the local port mapping that will be used to connect to the database – in this case it will be 1521.

ssh -i <privateKey> -N -L <localPort>:10.0.0.233:1521 -p 22 ocid1.bastionsession.oc1.iad.********************************************************************************[email protected]
Update to
ssh -i /Users/bcurtis/.ssh/id_rsa1 -N -L 1521:10.0.0.233:1521 -p 22 ocid1.bastionsession.oc1.iad.********************************************************************************[email protected]
If the RSA key requires a password, it will prompt for it. After providing the password, the tunnel will be established. It will be hard to tell, but after the password is entered and the return key struck the tunnel will be intialized and no command prompt will be returned – as illustrated in the below image.

Make Database connection
With the SSH tunnel established, we can now make a connection to the Oracle database with OCI. Using a sql tool like SQL Developer, we can quickly test a connection and then make a connection.
From SQL Developer, open the New/Select Database Connection dialog box. From here, we will provide the details needed for connecting to the Pluggable Database – information gathered earlier in the post.
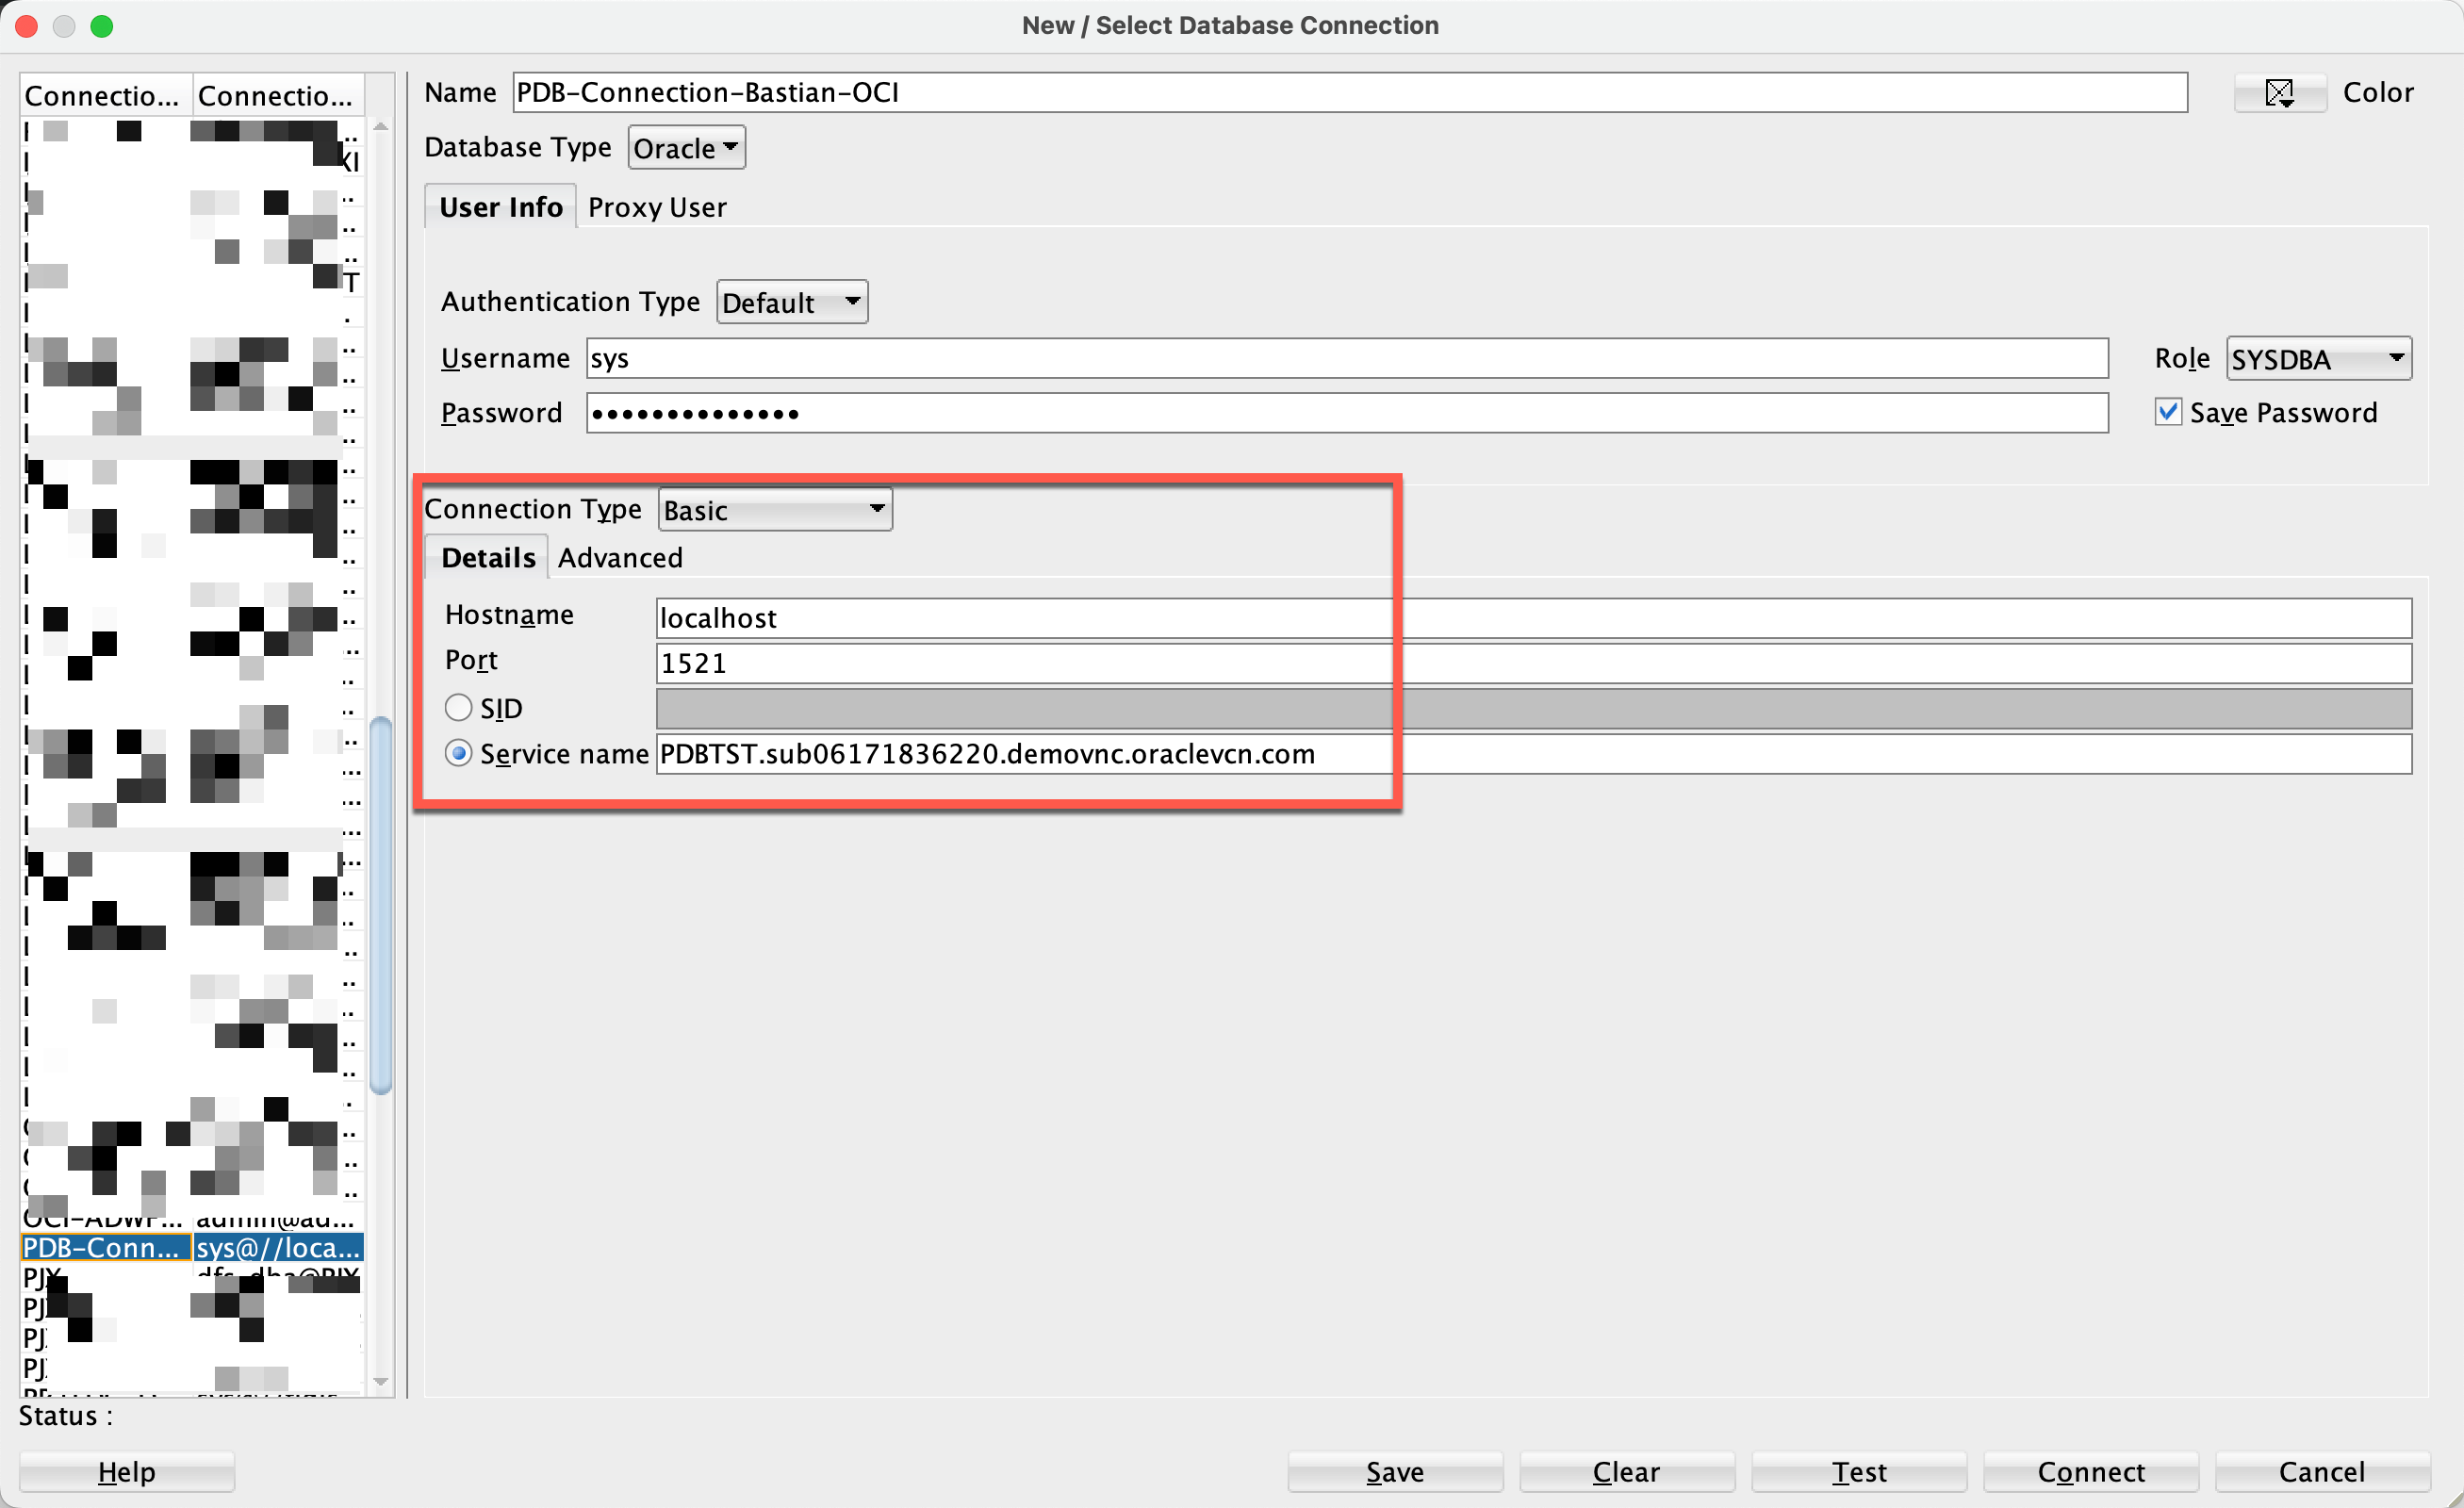
With all the required information filled out, select the “Test” button at the bottom to confirm a successful connection.

At this point, the connection to the Pluggable database can be established by clicking the “Connect” button.
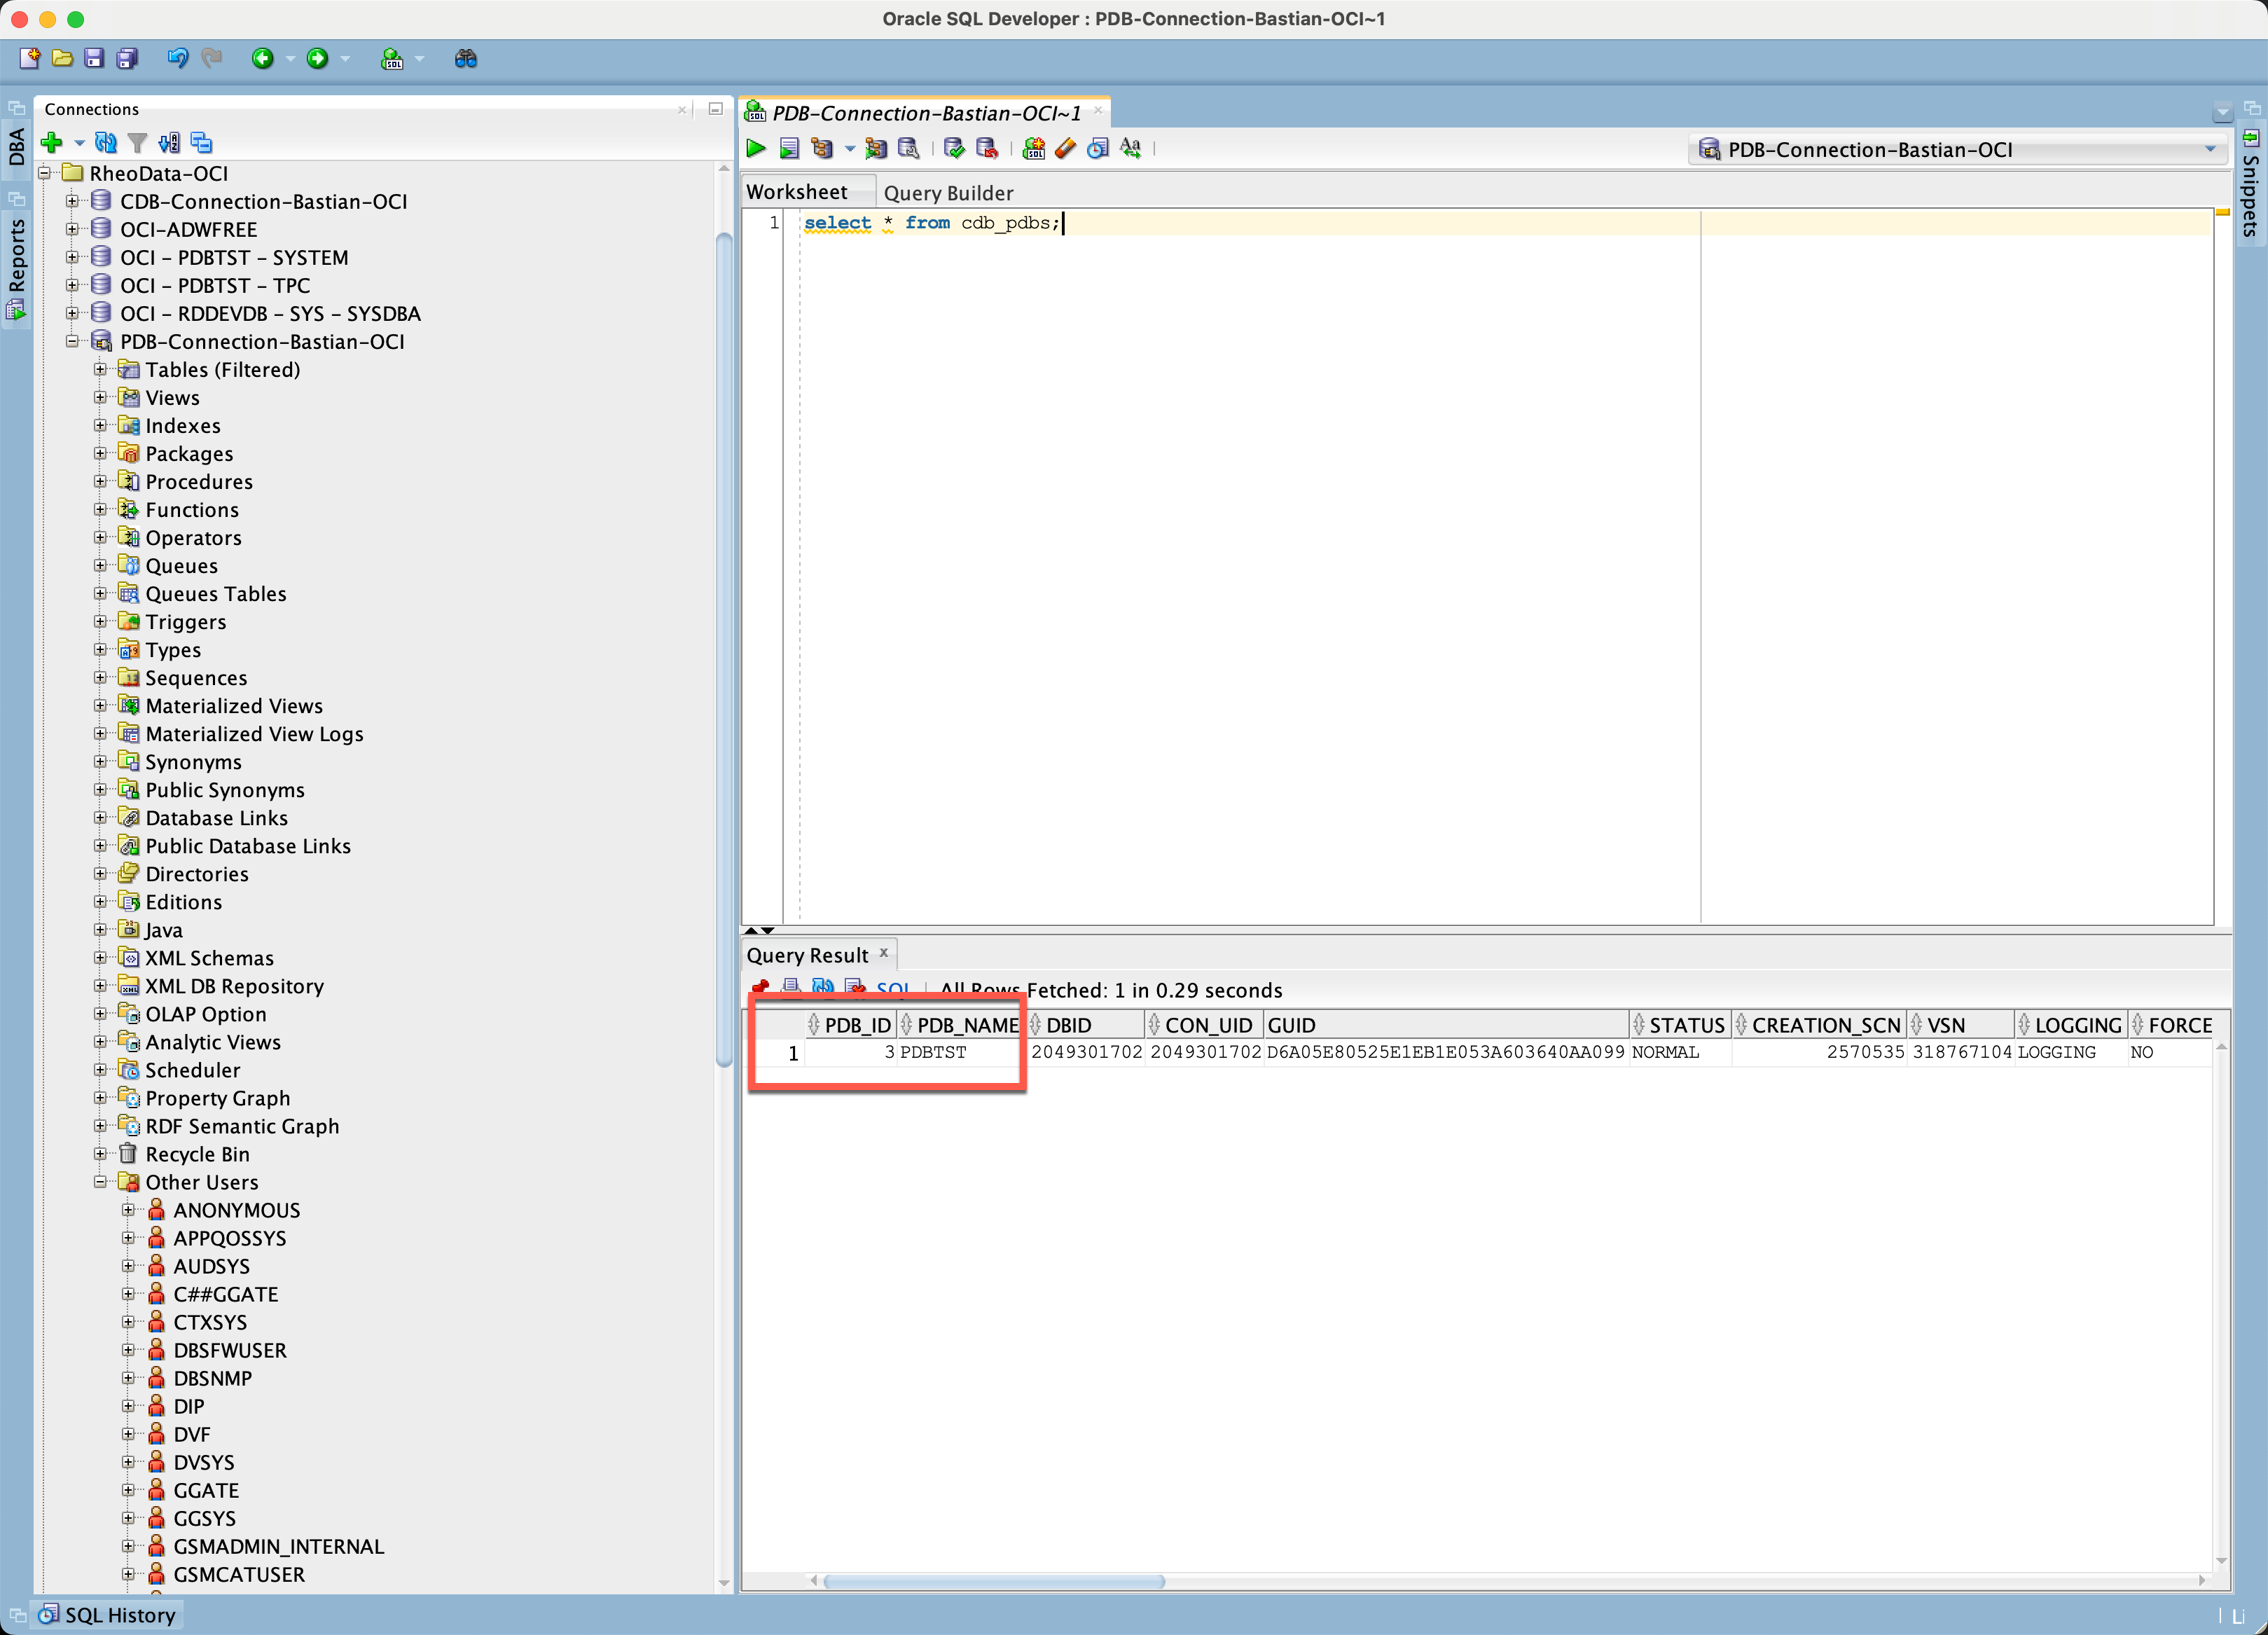
As you can tell, we have successfully connected to the OCI DBCS Pluggable Database this is on the private network within OCI. This is established through the Bastion host that was configured and accessible from anywhere.


