Oracle@GCP Setup: Enterprise Database Power Made Simple

Let me give you the straight story: setting up Oracle Database on Google Cloud Platform used to require weeks of planning, coordination between multiple teams, and enough documentation to fill a small library. Those days are behind us. What you’re about to see is how Oracle@GCP transforms enterprise database deployment into a streamlined process that any database administrator can execute confidently.
Why Oracle@GCP Changes Everything
Your expertise is invaluable when it comes to database strategy, but you shouldn’t have to spend weeks wrestling with infrastructure complexity. Oracle@GCP delivers the full power of Oracle Database Enterprise Edition with the operational simplicity of Google Cloud’s managed services. Here’s exactly how simple the setup process has become.
Step-by-Step Setup: From Search to Success
Step 1: Find Oracle Database Services
Starting from your Google Cloud Console, simply search for “oracle” in the top search bar. The platform immediately surfaces Oracle Database@Google Cloud as your first option, making discovery effortless and eliminating any guesswork about service availability.

Step 2: Choose Your Oracle Solution
Google Cloud presents you with clear options for Oracle database deployment. Select “Autonomous Database” to access Oracle’s self-managing database service, which handles routine maintenance tasks automatically while you focus on strategic initiatives. Click “Explore service” under the Autonomous Database option to access the service dashboard. The interface immediately shows you the autonomous database management area where you’ll create and monitor your Oracle instances.

Step 3: Navigate to Autonomous Database
The Autonomous Database dashboard displays your current instances (if any) and provides a prominent “Create” button for new deployments. This clean interface eliminates complexity while giving you full visibility into your database inventory. Click the “Create” button to launch the database creation wizard. The system guides you through a logical sequence of configuration decisions, ensuring you don’t miss critical settings while maintaining deployment speed.

Step 4: Configure Instance Details
Enter your Instance ID, Database name, and Display name using your organization’s naming conventions. The system validates your entries in real-time and shows you exactly which fields are permanent versus modifiable later, preventing costly mistakes.
Step 5: Select Workload Type
Choose from four optimized workload configurations: Data Warehouse, Transaction Processing, JSON, or APEX. Each option is clearly explained with use cases, allowing you to select the configuration that matches your specific performance requirements without extensive research.

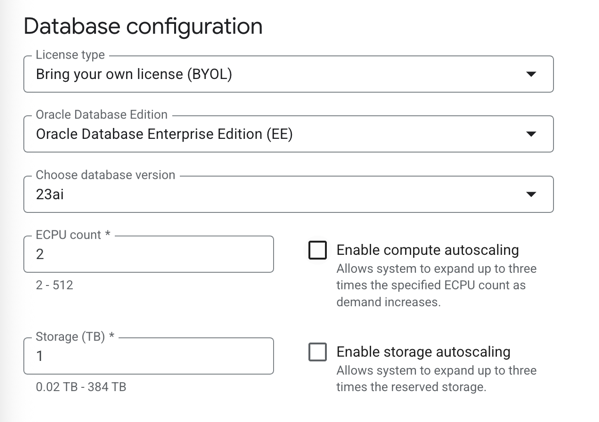
Step 6: Configure Database Specifications
Set your license type (BYOL or new), Oracle Database edition, version, CPU count, and storage requirements. The interface provides clear guidance on scaling options and shows cost implications in real-time, enabling informed decision-making.

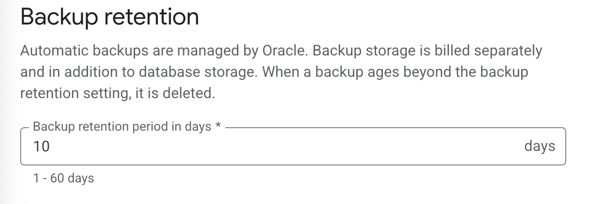
Step 7: Set Backup Retention
Configure your backup retention period from 1-60 days based on your compliance and recovery requirements. Oracle manages the entire backup process automatically, eliminating the operational overhead of traditional backup management.
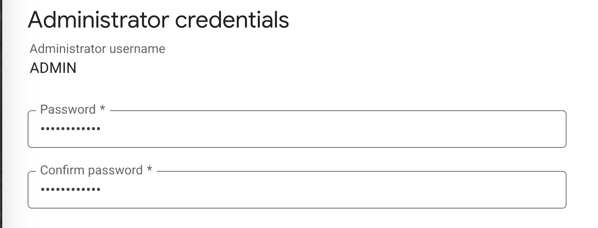
Step 8: Establish Administrator Credentials
Create your ADMIN username and secure password for database administration. The system enforces Oracle’s security standards while keeping the credential setup process straightforward and secure.
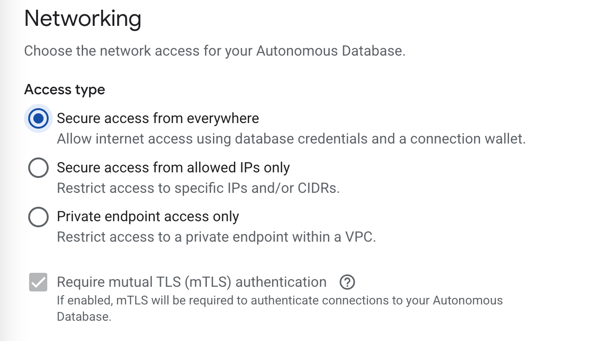
Step 9: Configure Network Access
Select your network access model: secure access from everywhere, IP-restricted access, or private endpoint access only. The default secure access option provides immediate connectivity while maintaining enterprise-grade security through database credentials and connection wallets.
Step 10: Set Operational Contacts
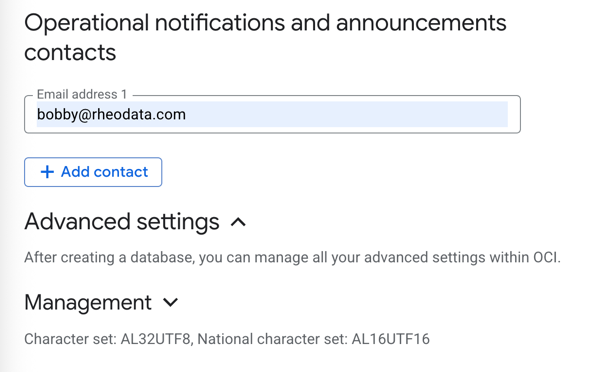
Add notification email addresses for operational updates and announcements. The system keeps you informed of maintenance windows, updates, and any issues without overwhelming your inbox with unnecessary alerts.
Step 11: Complete Database Creation
Click “Create” to deploy your Oracle Autonomous Database. The system begins provisioning immediately, with typical deployment times measured in minutes rather than hours or days.

Real-Time Deployment Monitoring
Monitoring Phase 1: Initial Provisioning
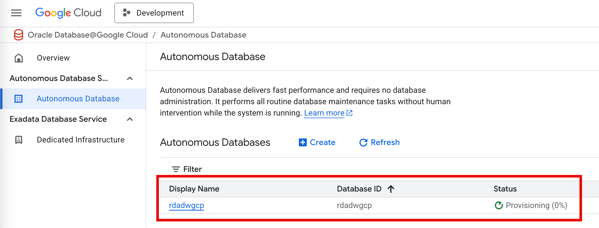
Your database appears in the dashboard with “Provisioning (0%)” status immediately after creation starts. The real-time status updates keep you informed of deployment progress without requiring constant manual checking.
Monitoring Phase 2: Active and Ready
Once provisioning completes, your database status changes to “Available” with full resource allocation displayed (2 ECPU, 1 TB storage). The system provides immediate confirmation that your database is ready for connections and workload deployment.

Seamless OCI Integration
Direct OCI Access
Notice the “Manage in OCI” button prominently displayed in your Google Cloud console. This direct integration allows you to leverage Oracle’s native management tools without losing the benefits of Google Cloud’s infrastructure and billing integration.

Full OCI Administrative Control
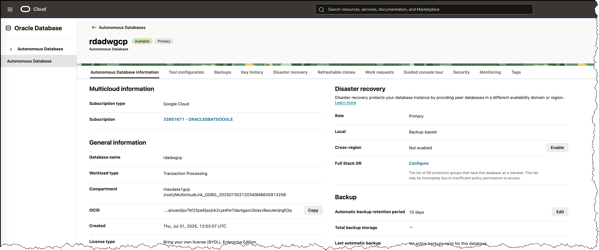
Clicking “Manage in OCI” provides immediate access to comprehensive database management within Oracle Cloud Infrastructure. You gain access to advanced configuration options, detailed monitoring, disaster recovery settings, and all enterprise-grade administrative capabilities you expect from Oracle Database.
What This Means for Your Organization
The setup process you just witnessed typically completes in under 15 minutes from start to finish. Compare that to traditional Oracle database deployments that require infrastructure procurement, OS installation, Oracle software installation, network configuration, security hardening, and backup setup – processes that often take weeks to coordinate and execute.
Your team gets enterprise-grade Oracle Database functionality with cloud-native operational simplicity. No compromise on database capabilities, no sacrifice of security or performance standards, and no extended deployment timelines that delay critical business initiatives.
Ready to Transform Your Database Strategy?
Oracle@GCP delivers exactly what you need: proven Oracle Database technology with Google Cloud operational excellence. The deployment process is this straightforward, the management is this intuitive, and the results are this reliable.
Let’s coordinate on your Oracle@GCP implementation. Your database infrastructure should accelerate your business objectives, not slow them down.
Ready to get started? Contact RheoData ([email protected]) today to discuss how Oracle@GCP fits your specific requirements. We’ll help you plan the migration, execute the deployment, and optimize your database performance from day one.


